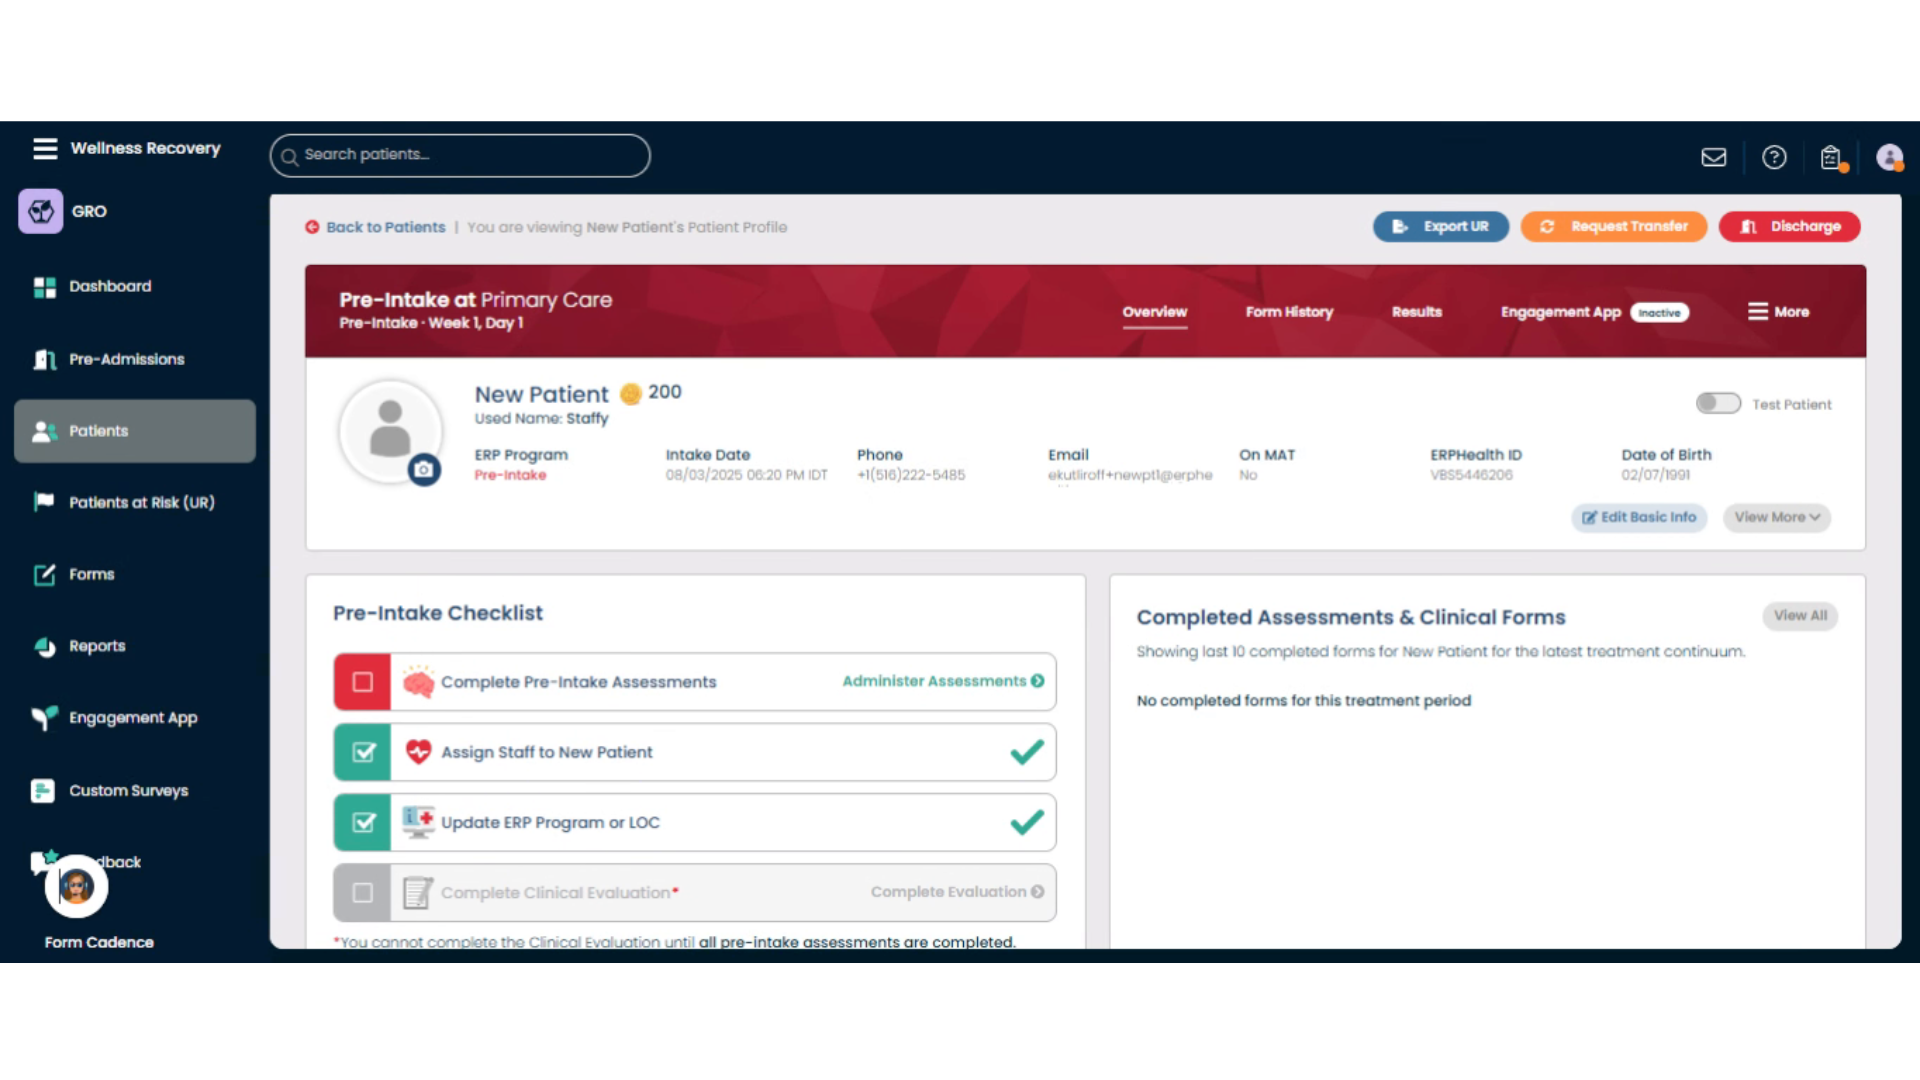
New Patient Dashboard Overview
Explore the New Patient Dashboard to efficiently manage patient intake and treatment details
1. Introduction
This guide walks you through key actions from viewing patient information to updating treatment programs and assessments.
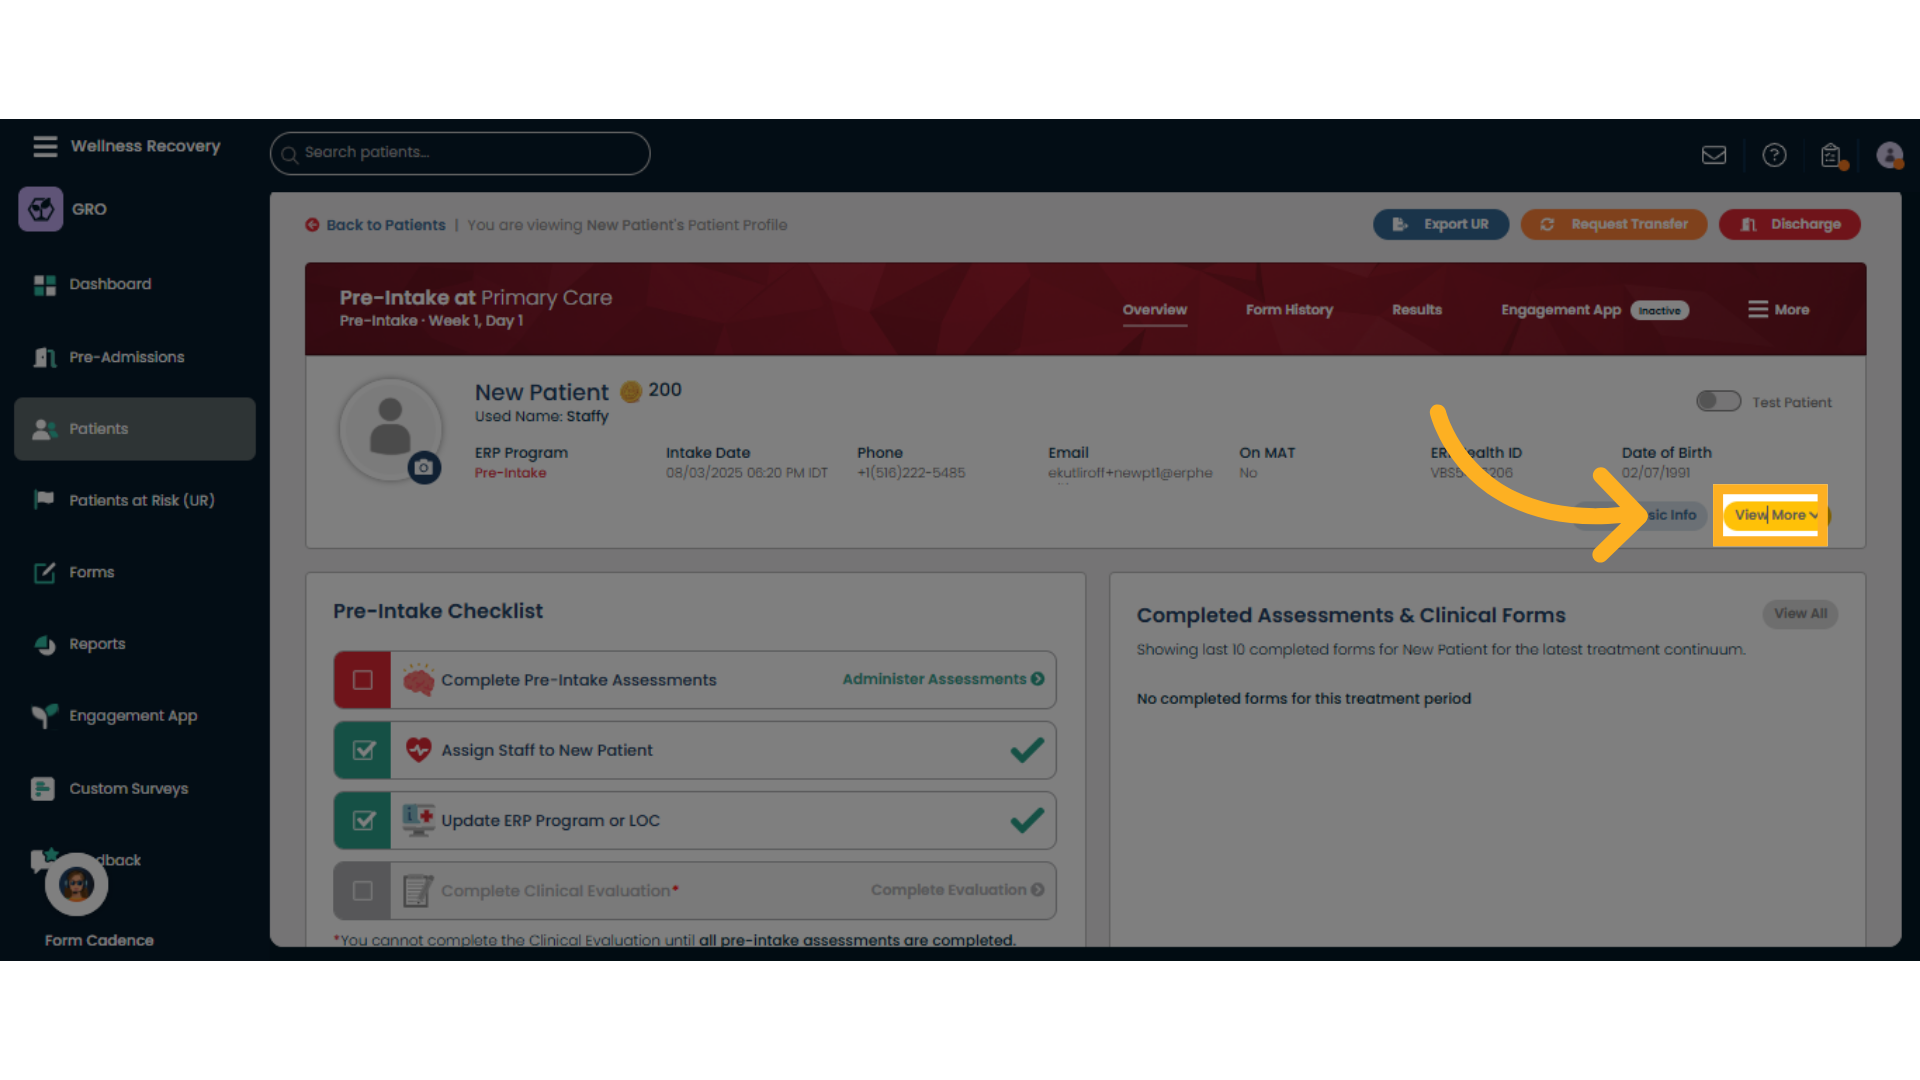
2. Click "View More"
Expand the patient details section by selecting 'View More' to access additional information. Click "Edit Basic Info" to update any of the patient profile information.
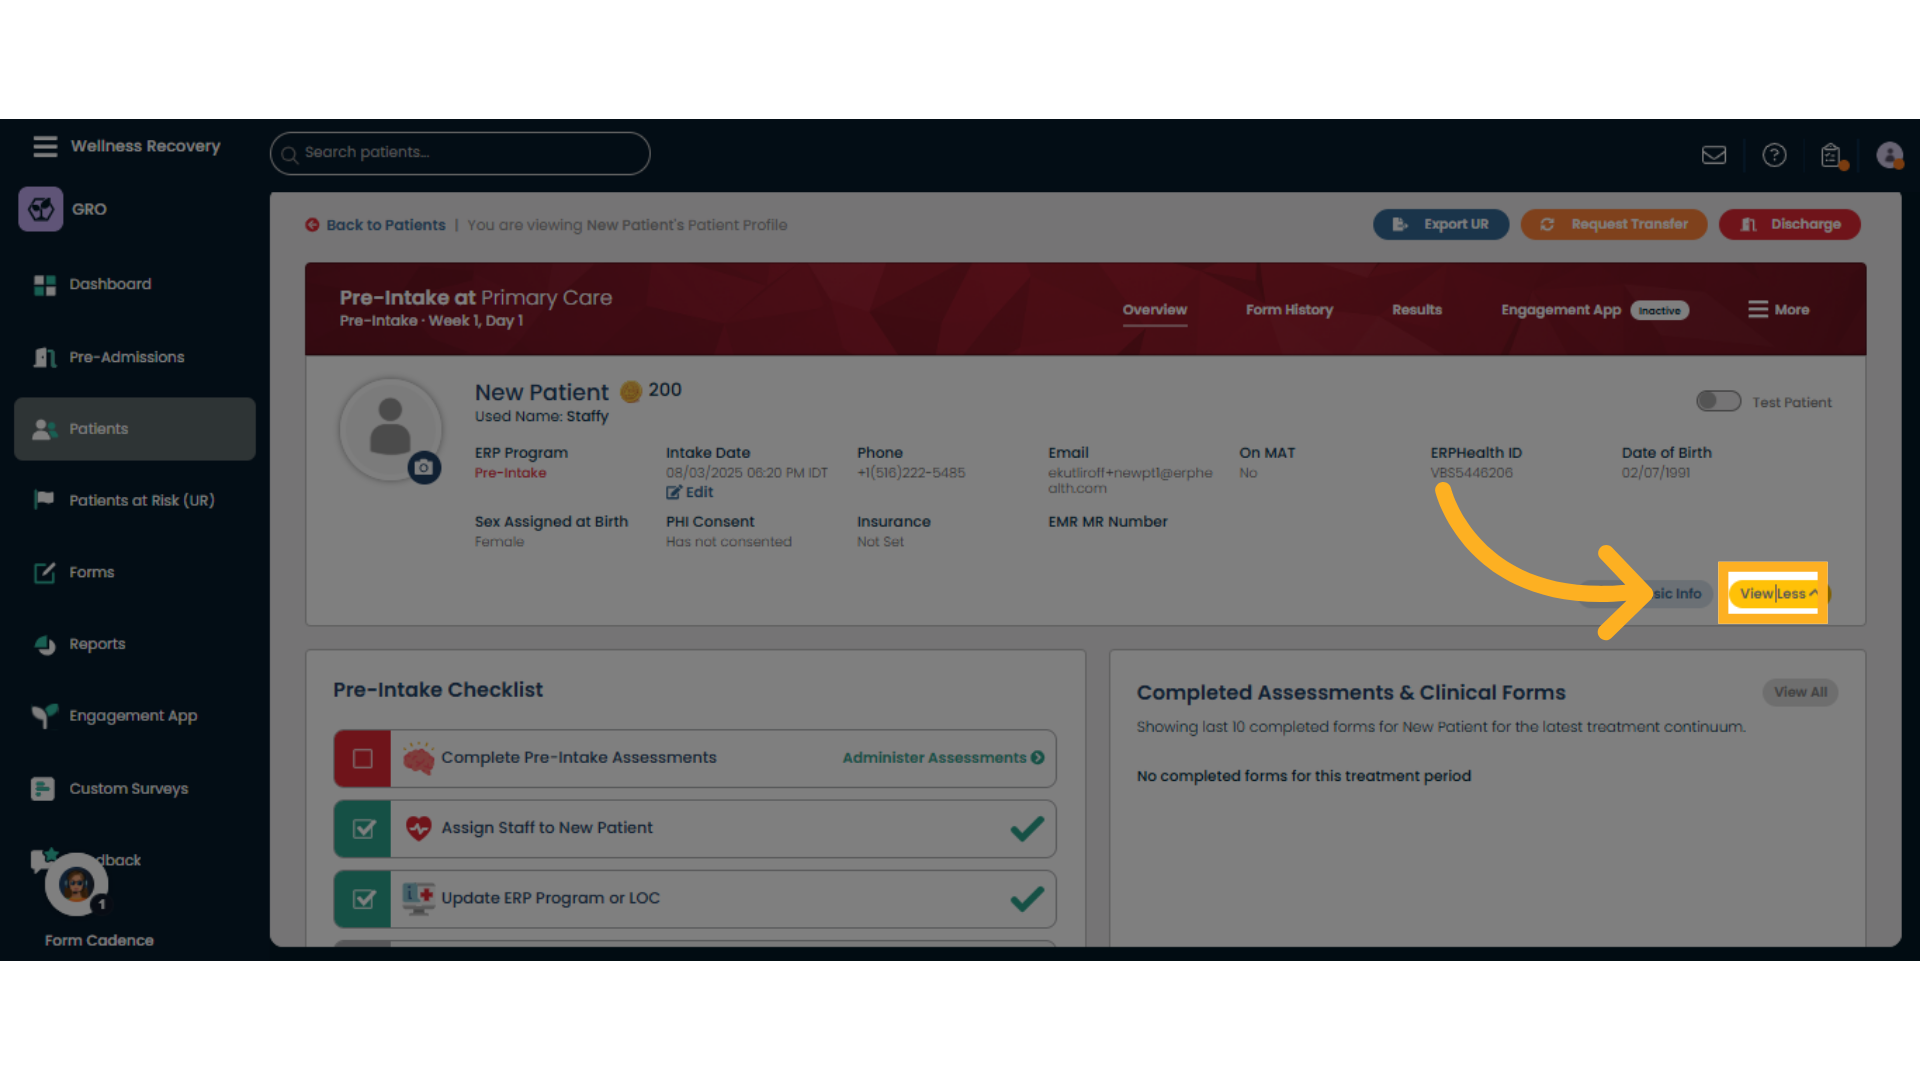
3. Click "View Less"
Collapse the expanded details by choosing 'View Less' to simplify the view.
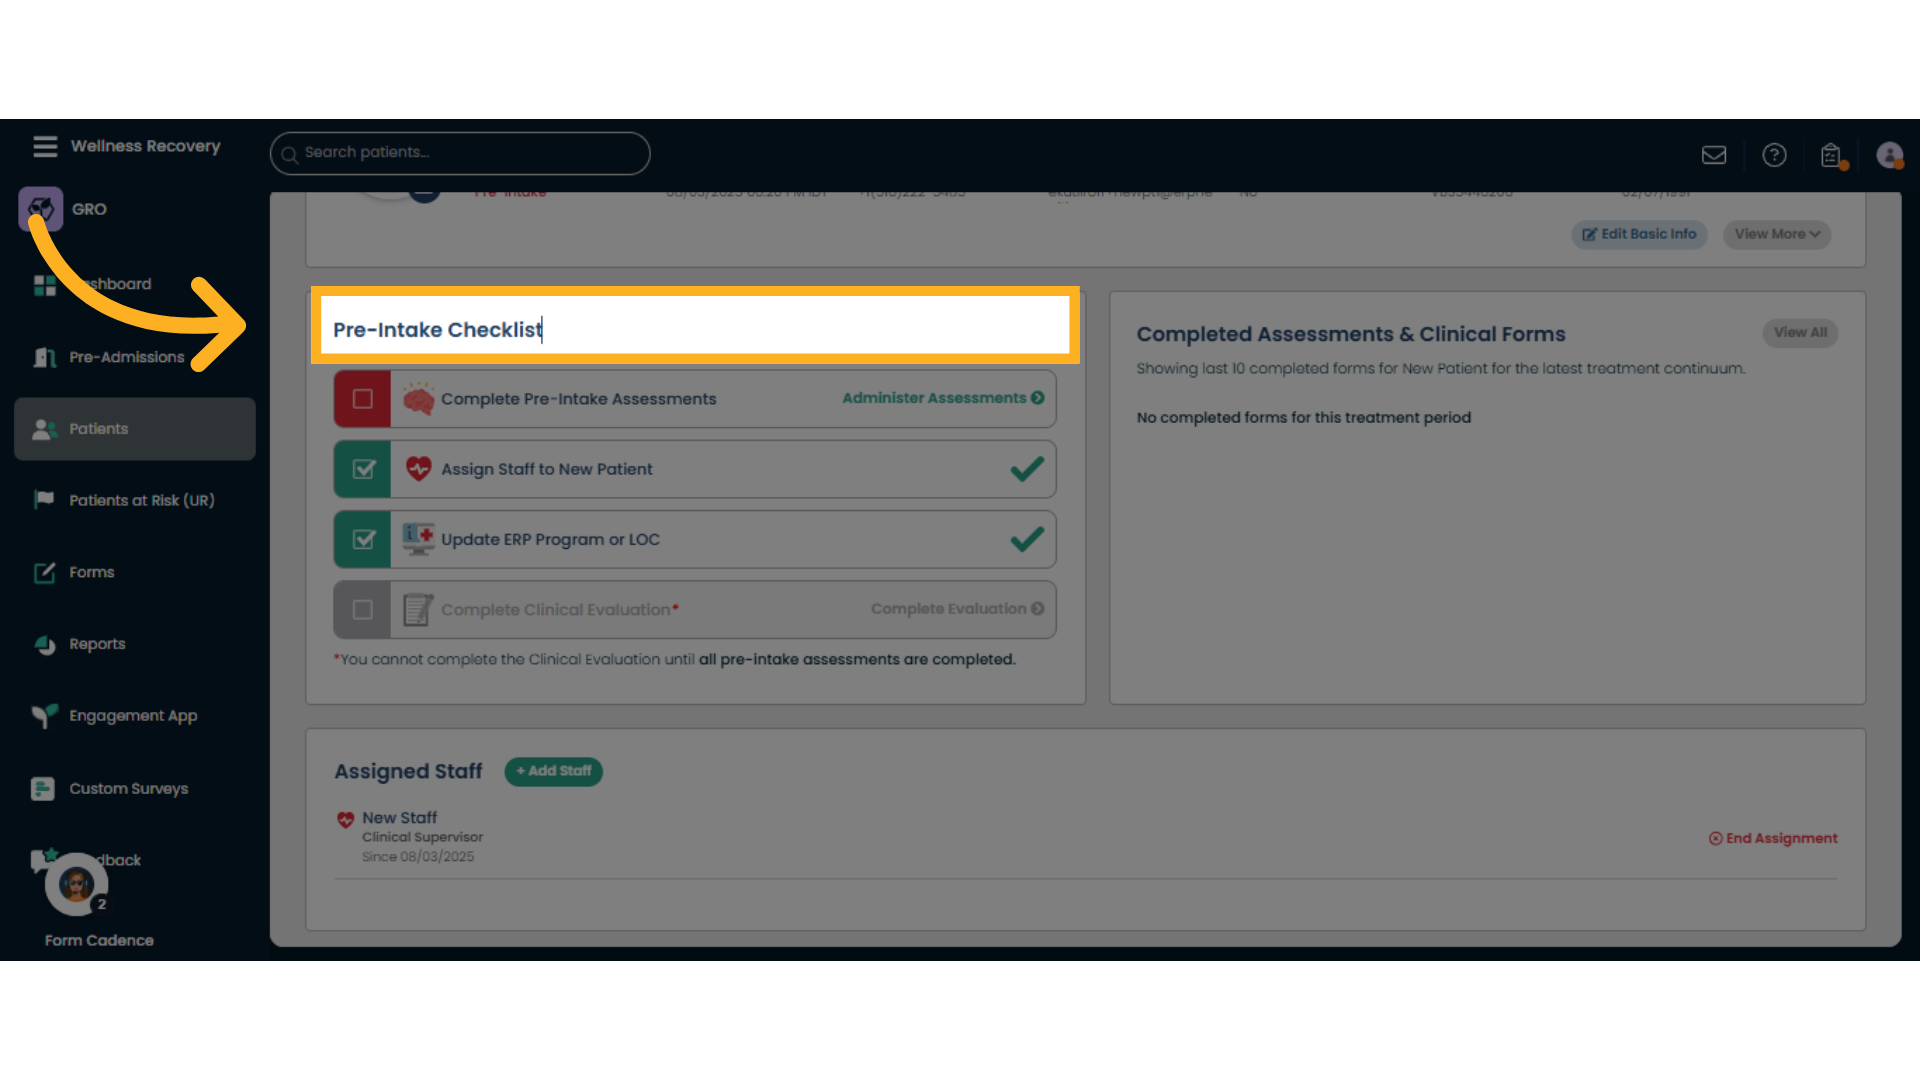
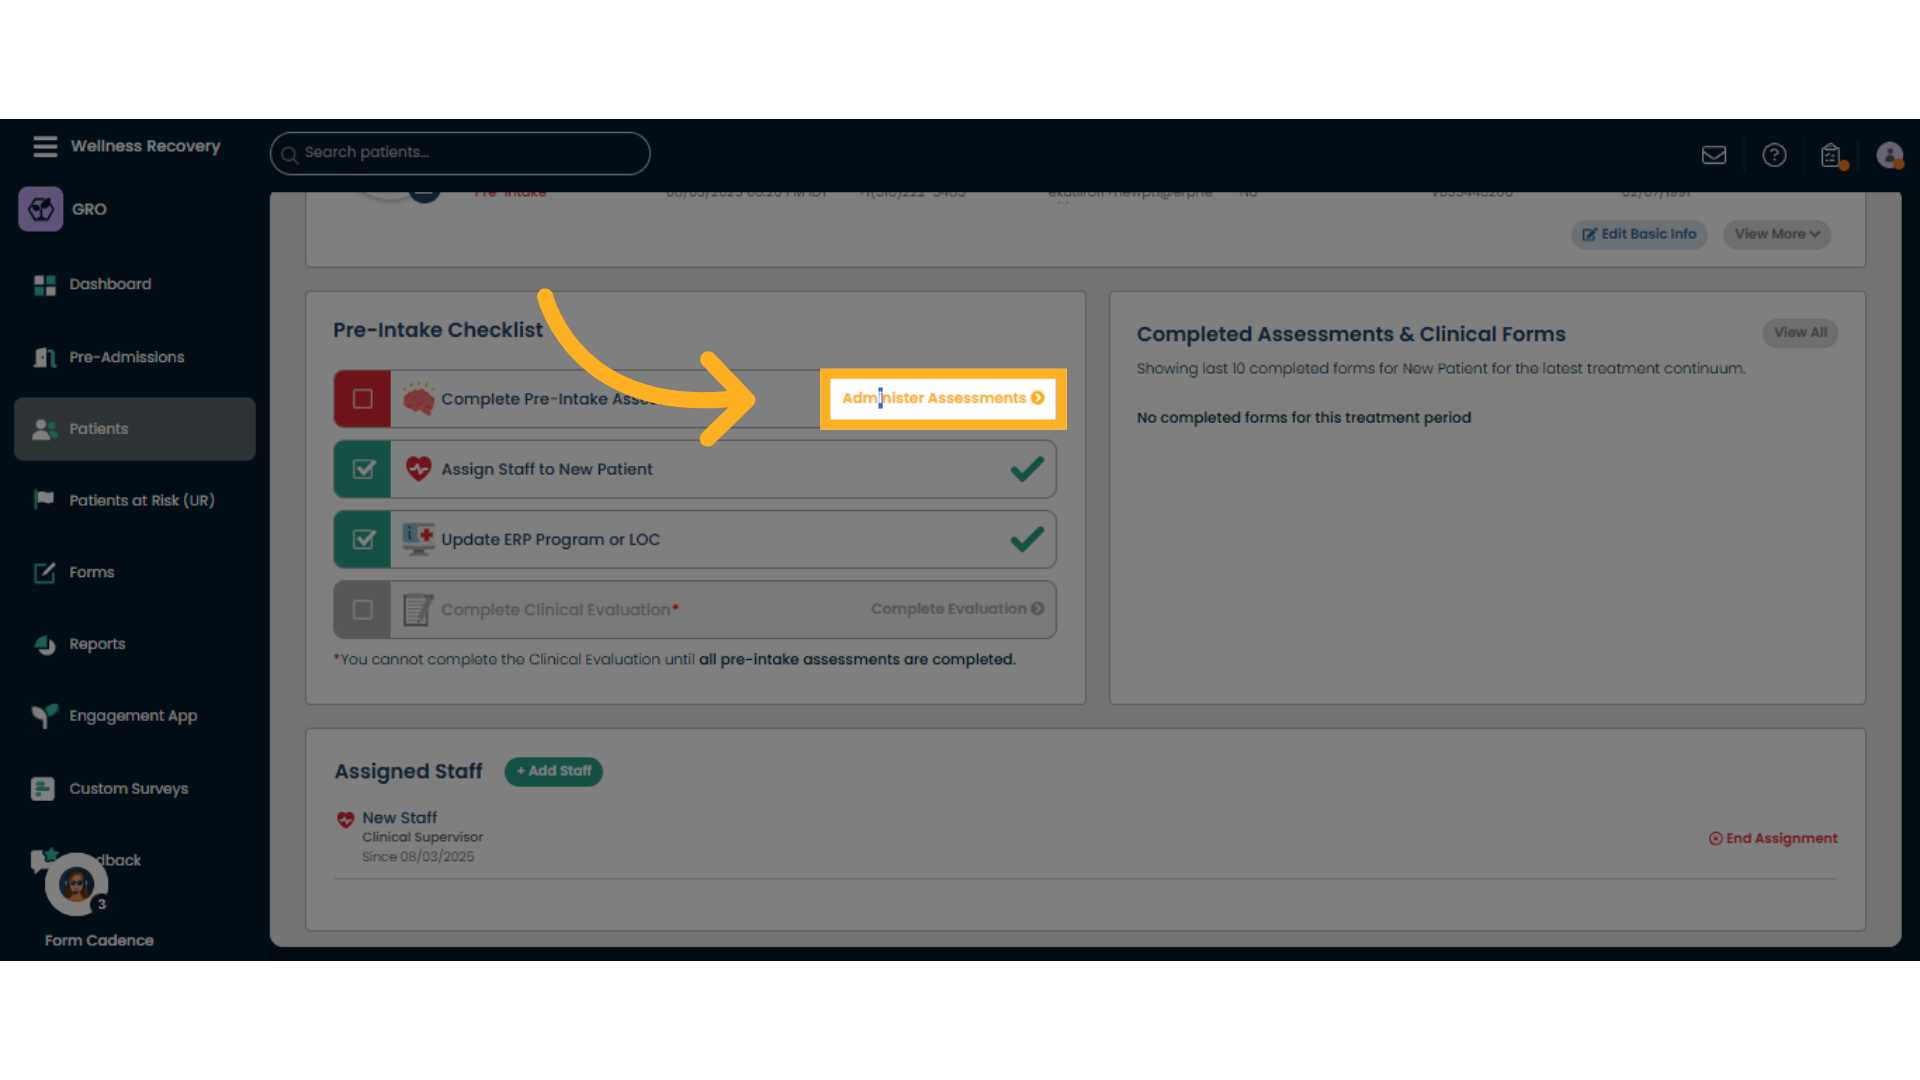
4. Click "Pre-Intake Checklist"
Navigate to the 'Pre-Intake Checklist' to review initial patient requirements.
5. Click "Administer Assessments"
Access the 'Administer Assessments' area to begin patient evaluation forms.
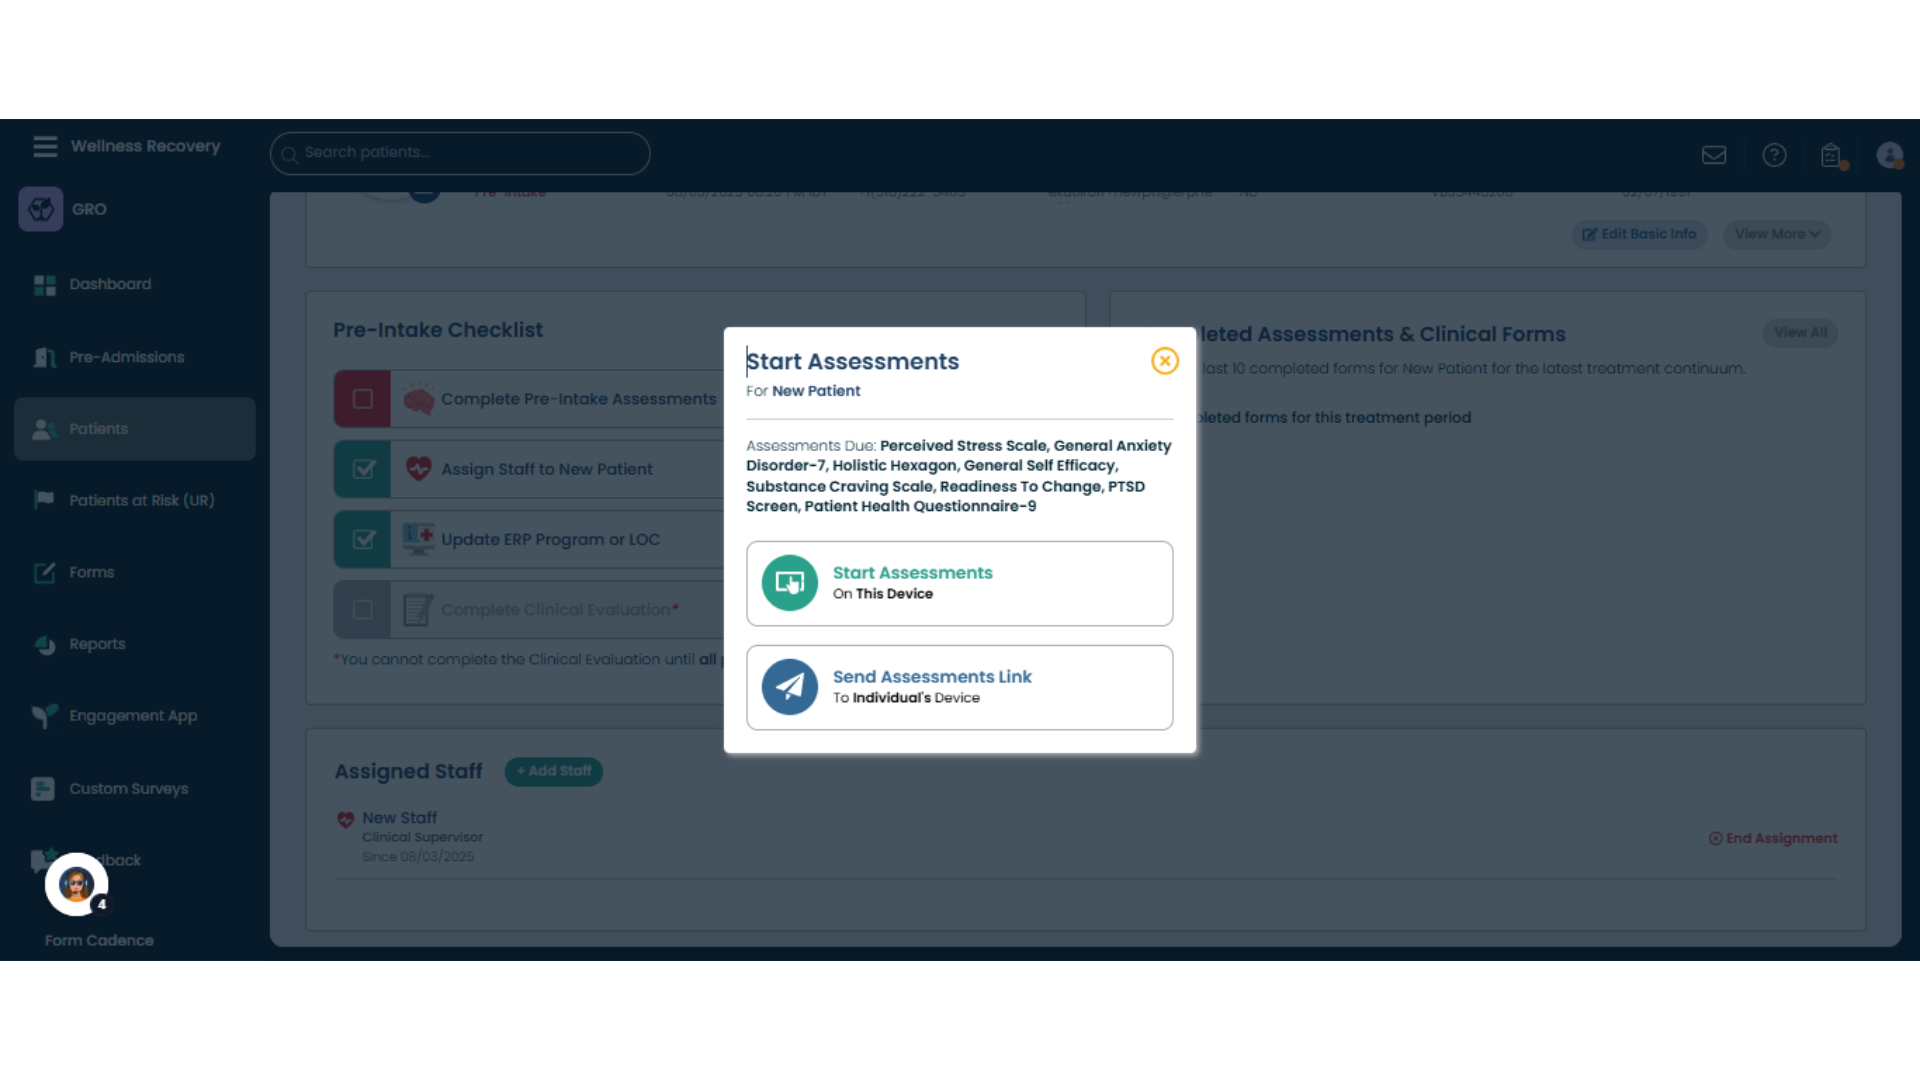
6. Choose where to administer assessments
In this box, you may start assessments on this device, or send the patient a link through their email or SMS, and they can take assessments on their own device.
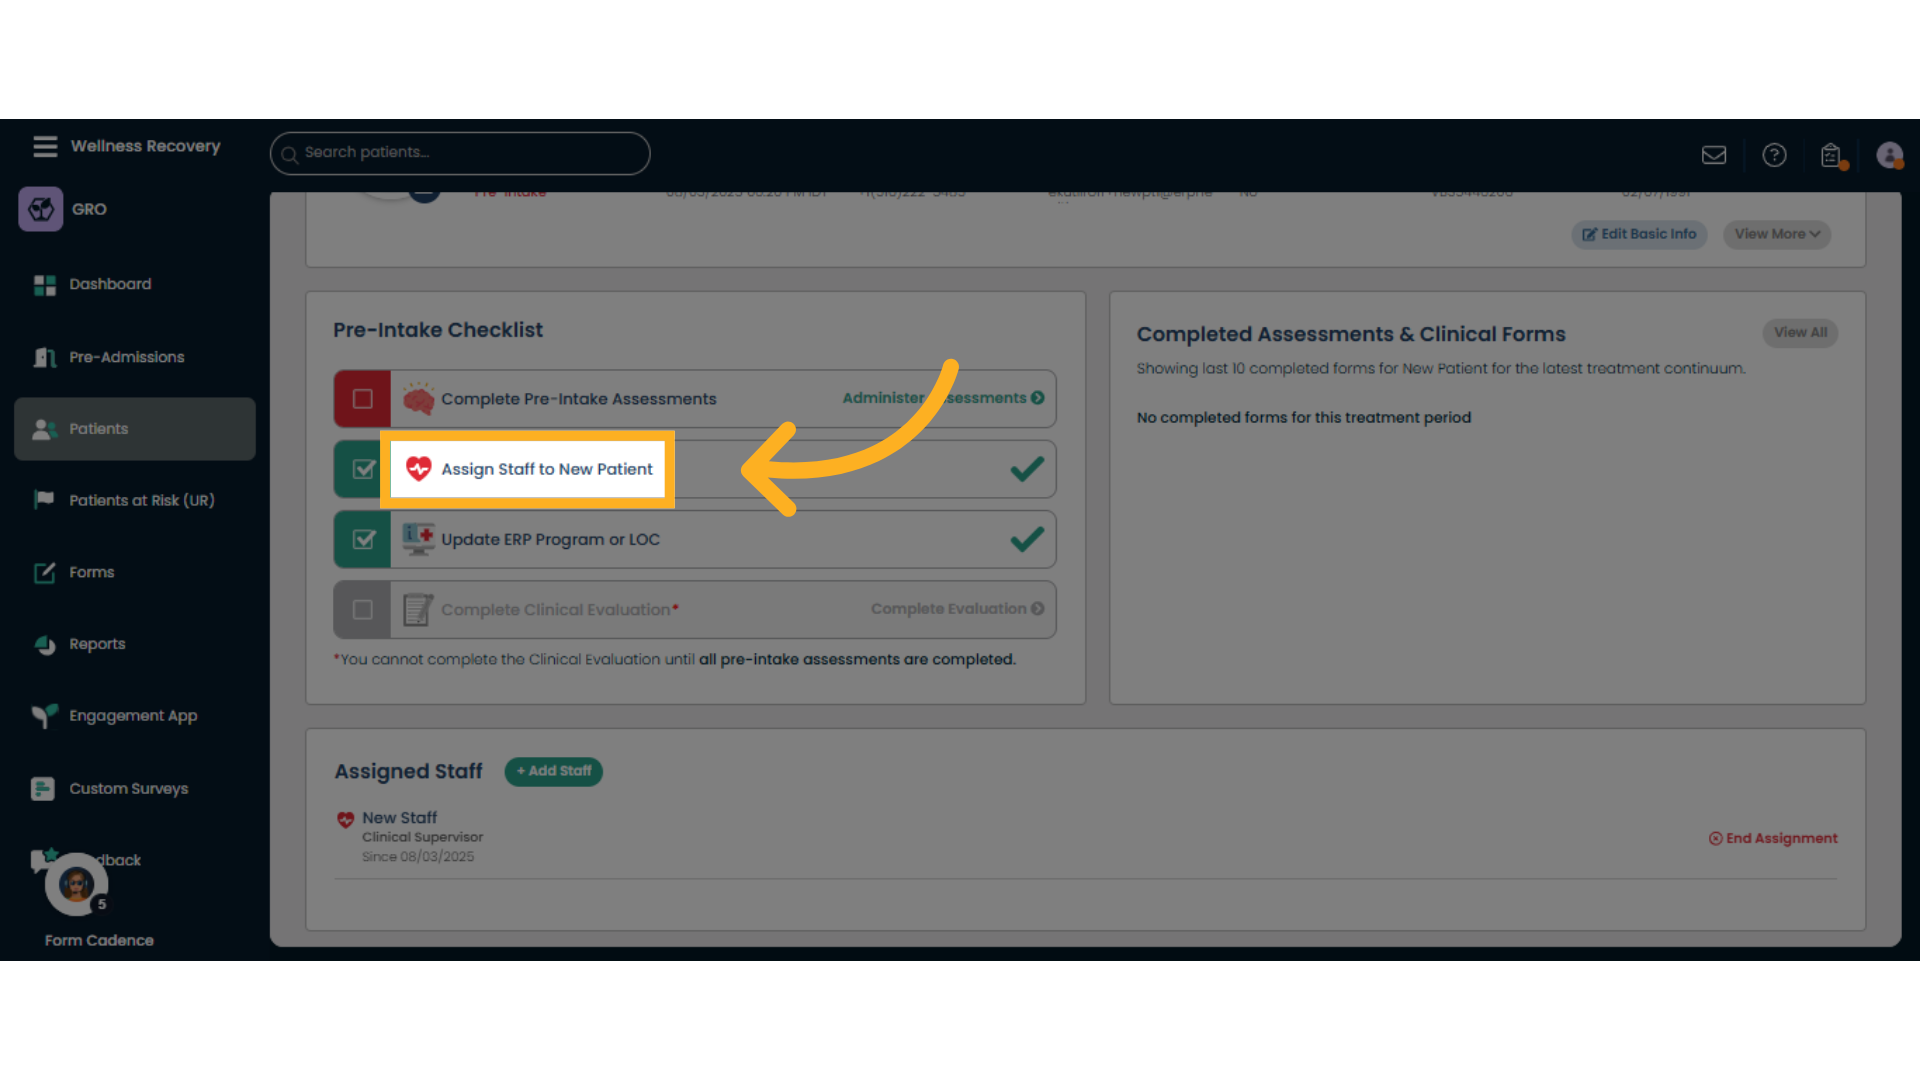
7. Click "Assign Staff to New Patient"
Initiate the process to assign staff members to a new patient. Usually this is done during patient creation, but if not, you will be asked here to assign a staff member to the patient.
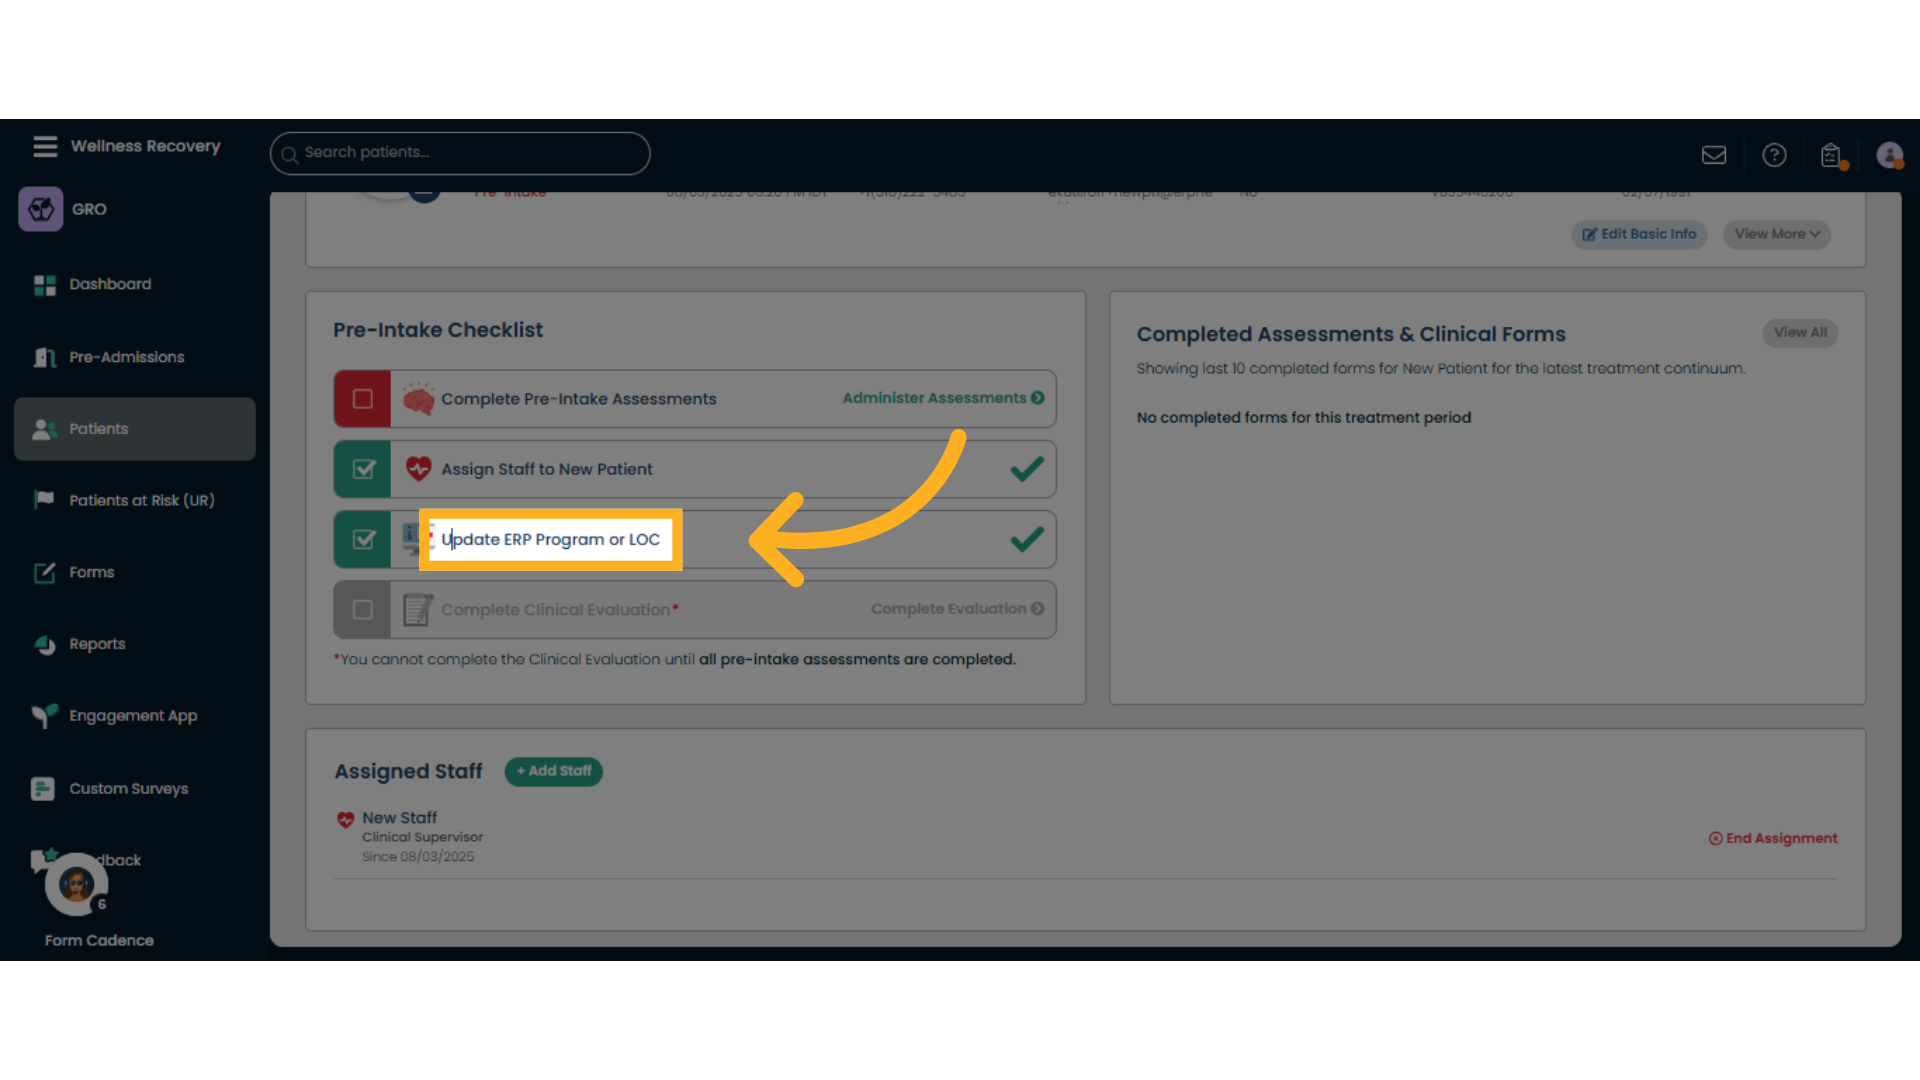
8. Click "Update ERP Program or LOC"
Open the option to update the patient's ERP program or Level of Care (LOC). Usually this is also done during patient creation, if not, you will be asked to do it here. To edit the ERP Program or LOC, click here.
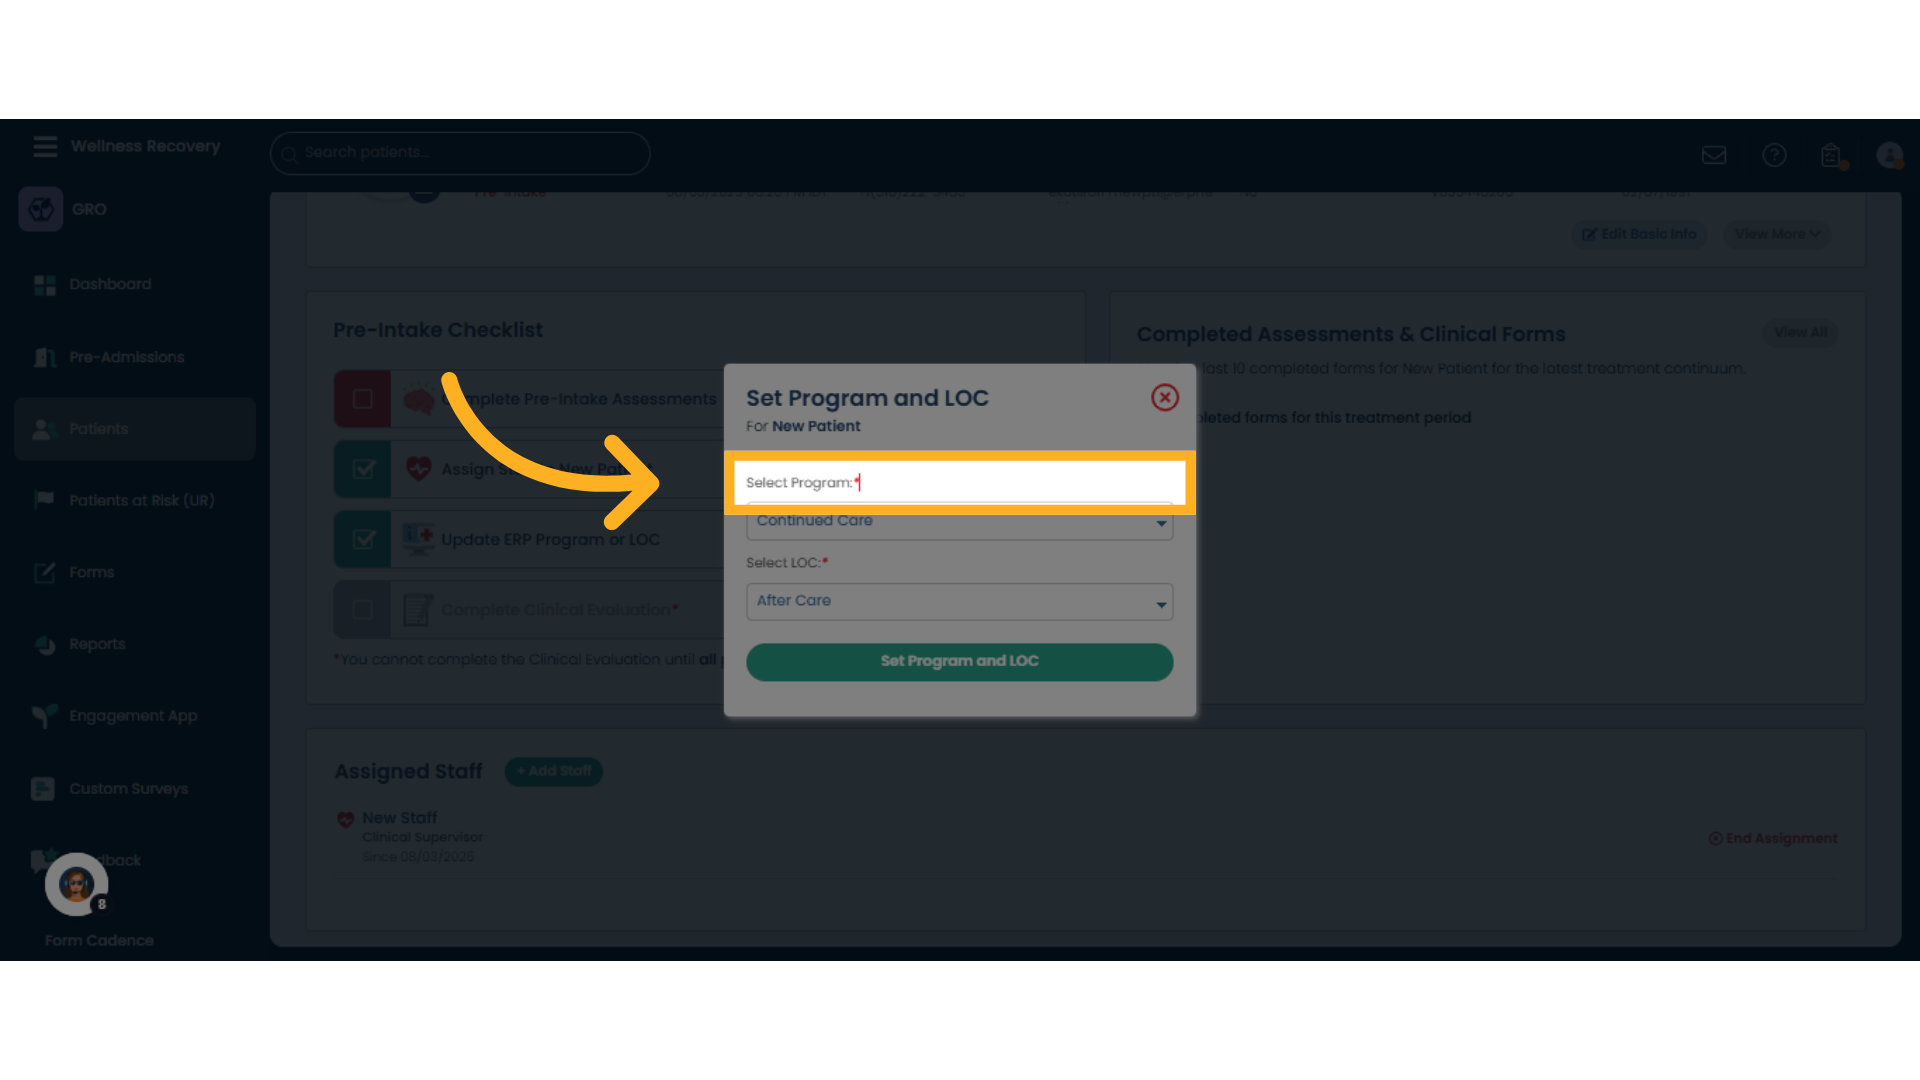
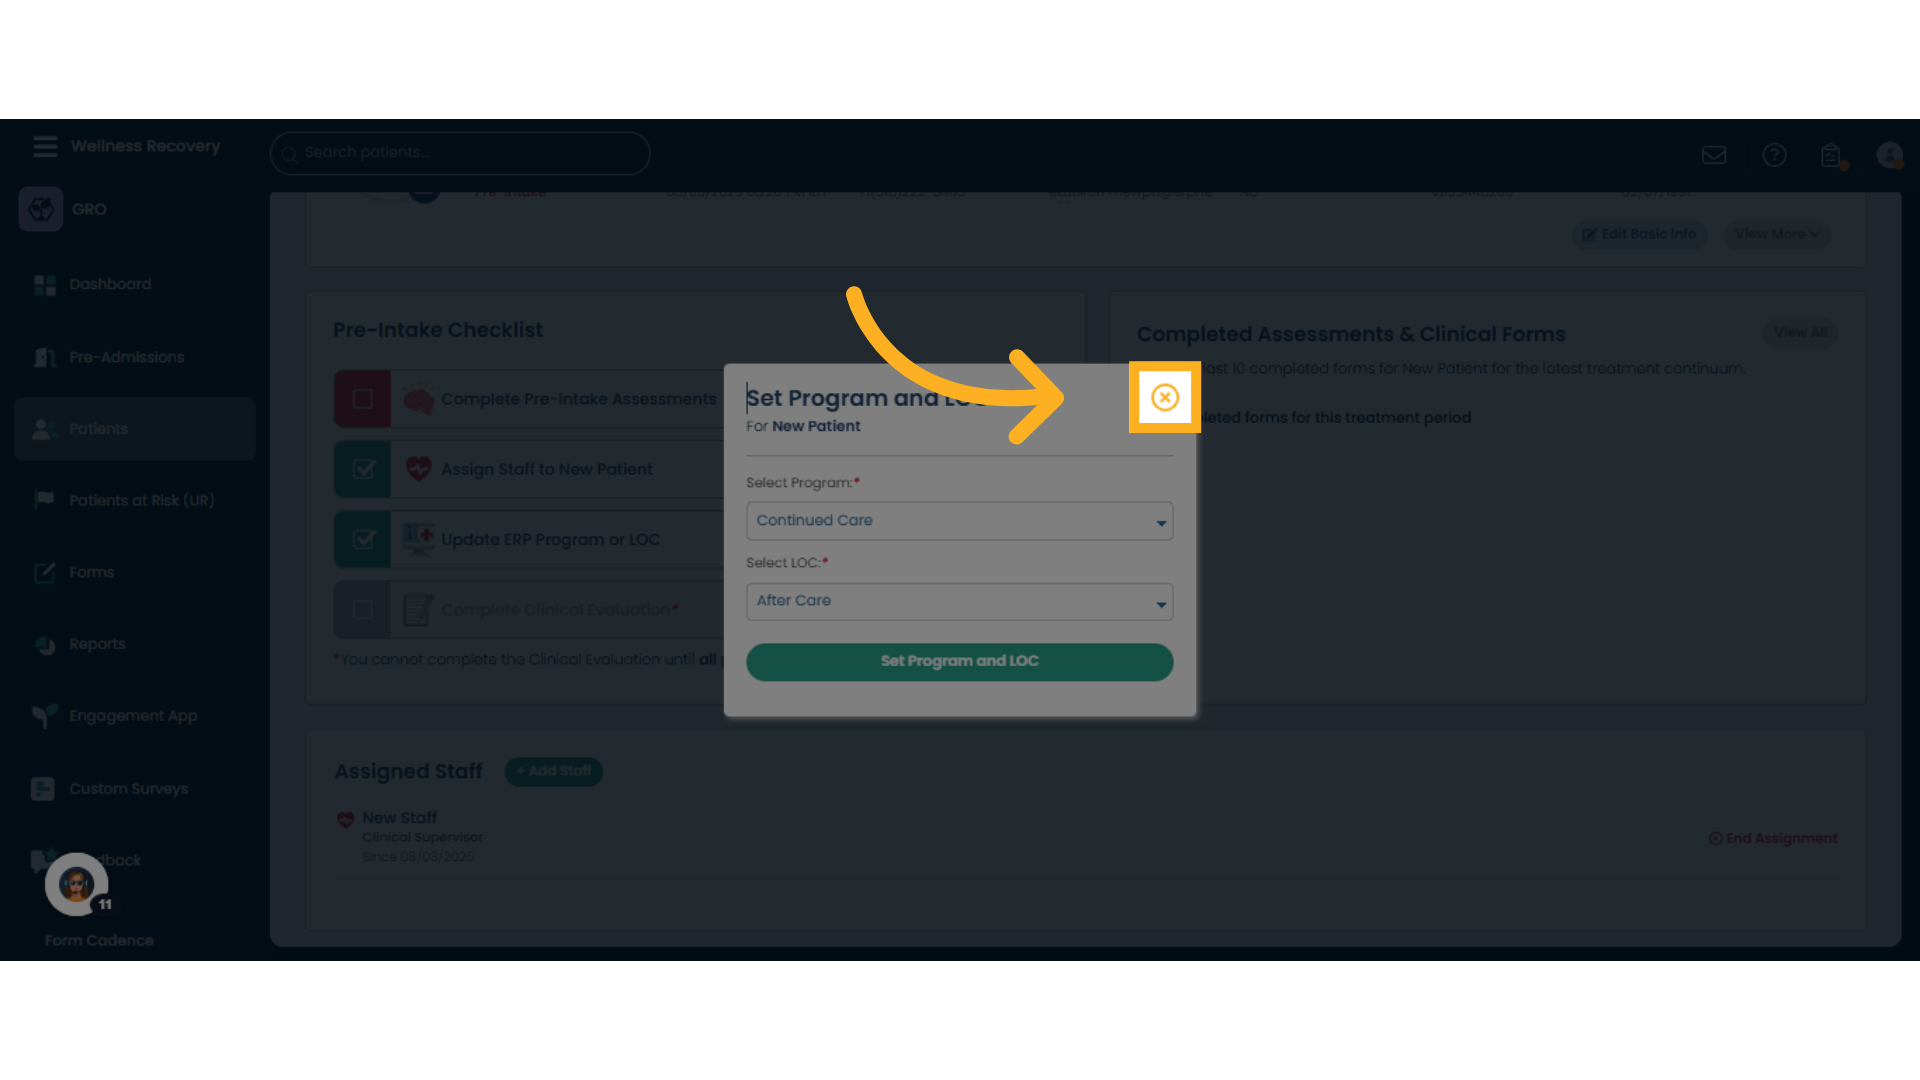
9. Edit Program or LOC box
Browse through the list of available programs under 'Continued Care' to find the appropriate one.
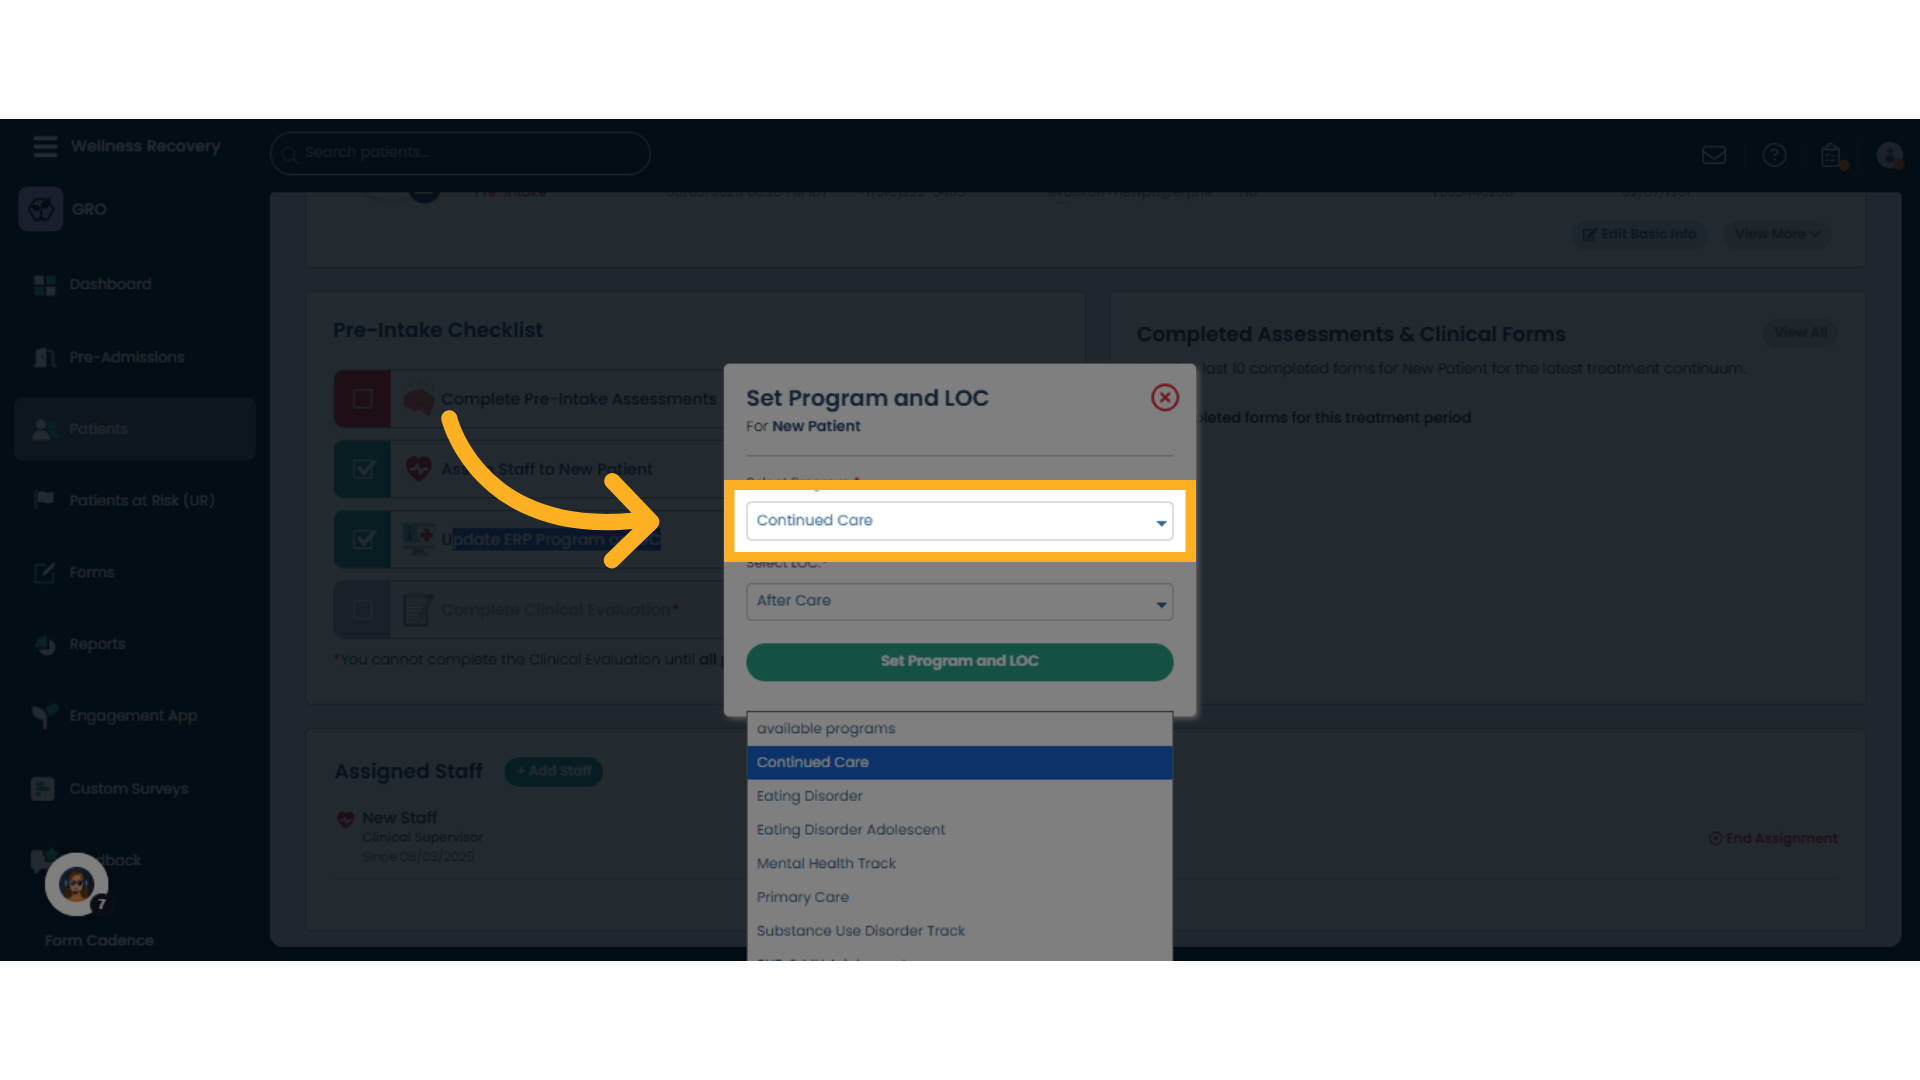
10. Choose new Program
Choose the desired program from the program selection dropdown menu.
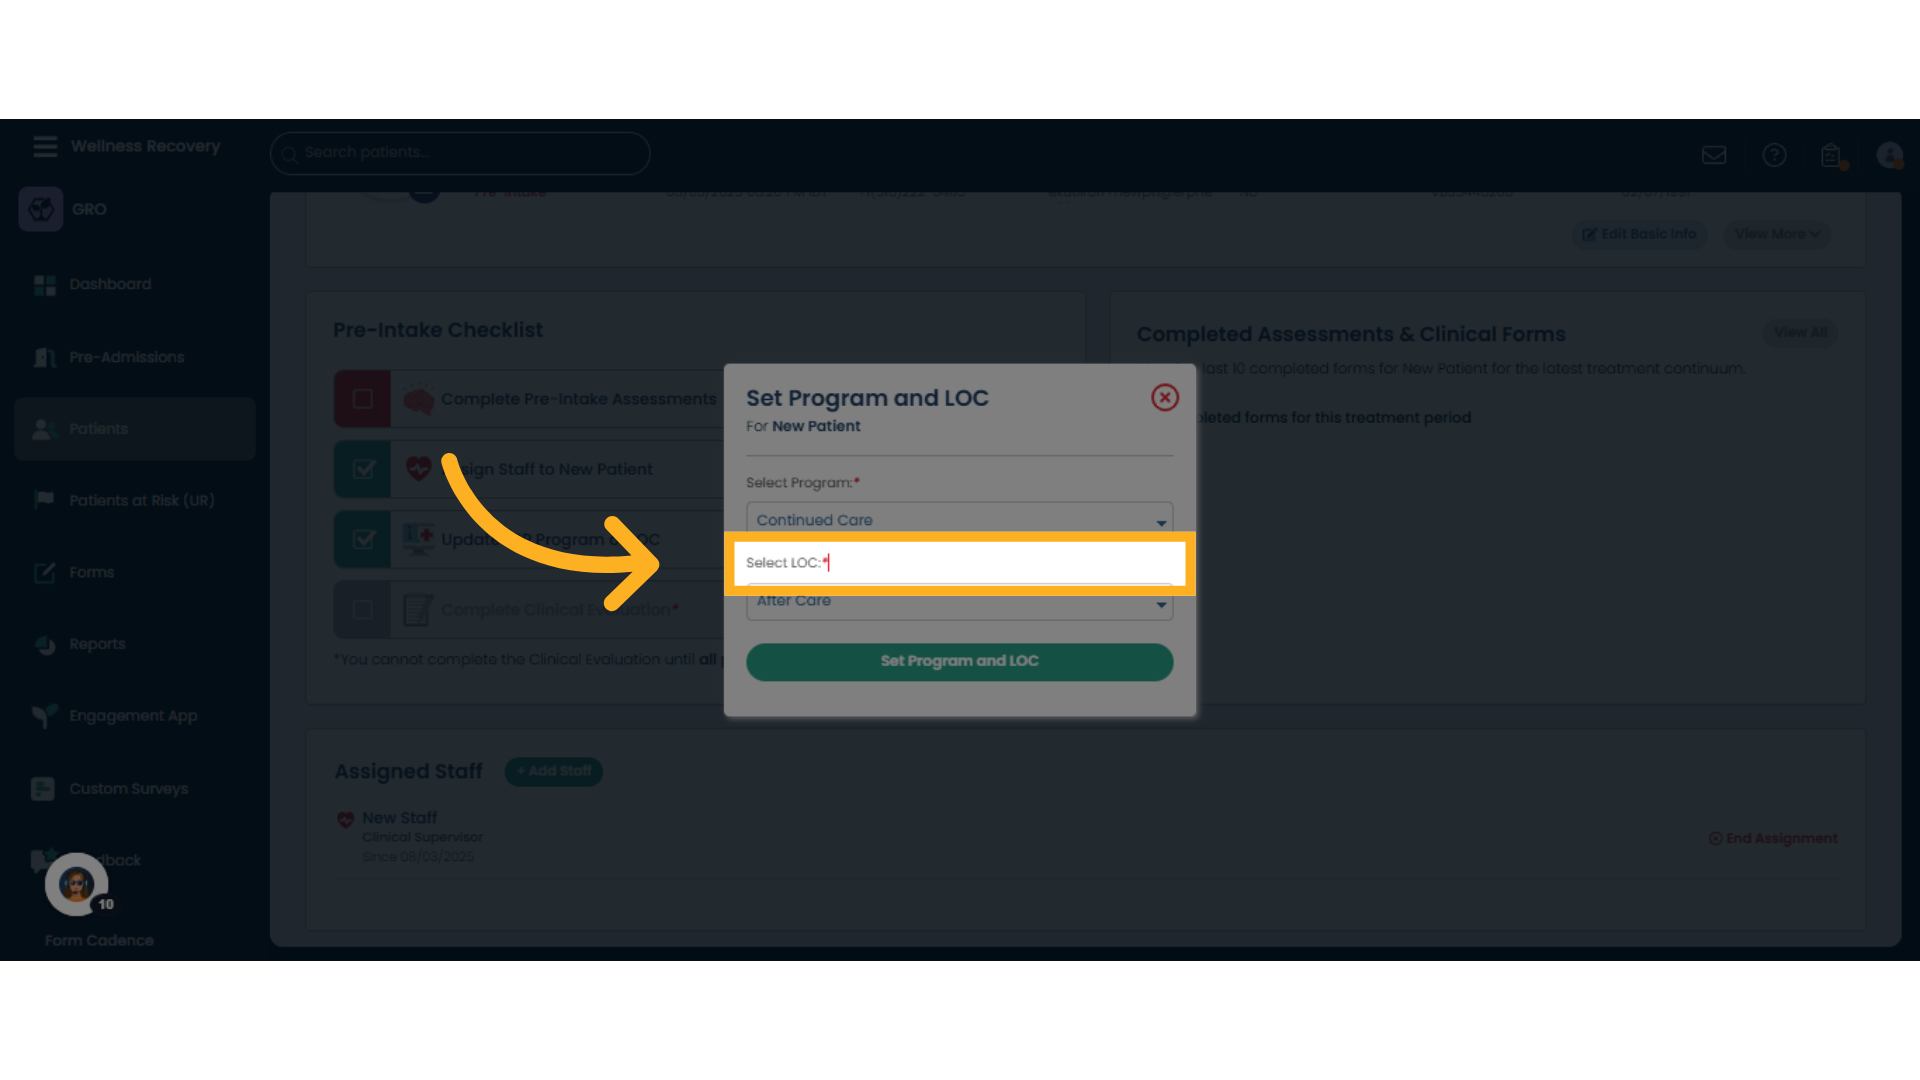
11. Choose new LOC
Review the available Levels of Care (LOC) options.
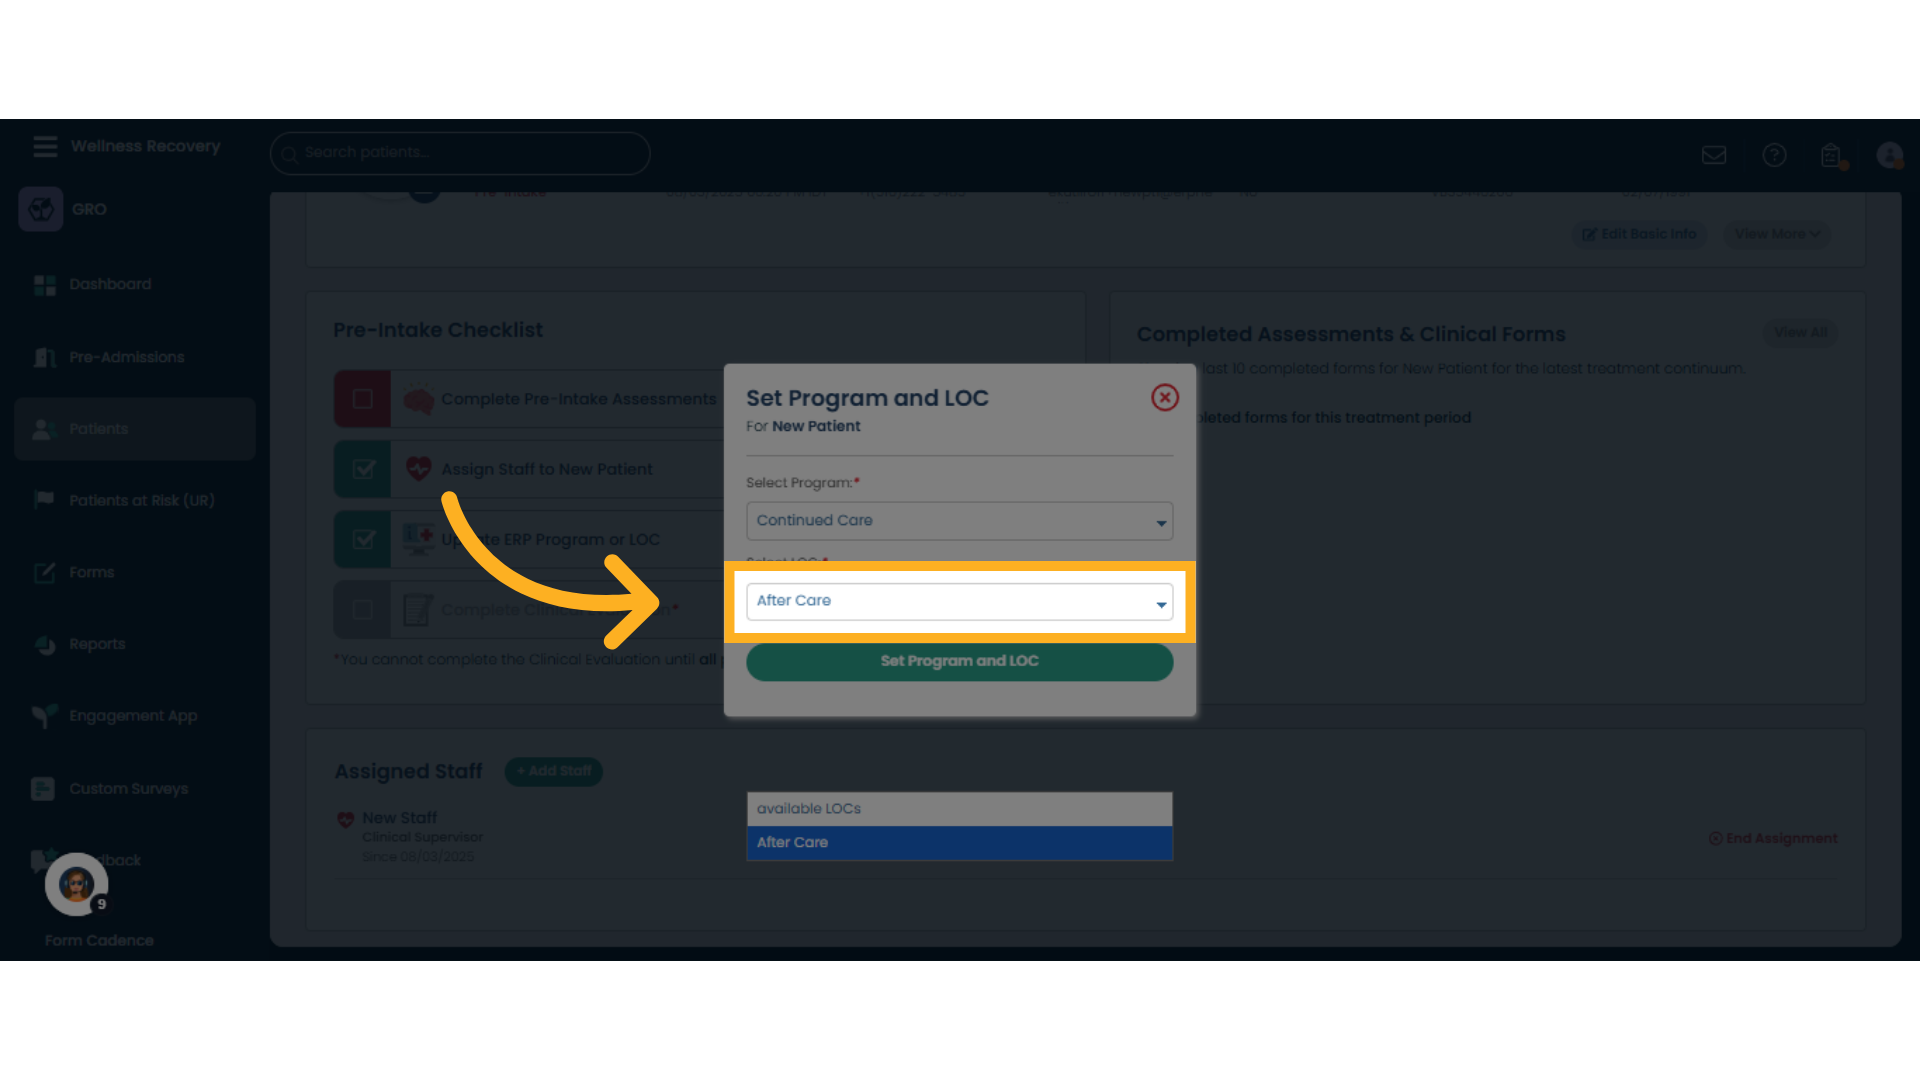
12. Select new LOC
Select the suitable Level of Care from the LOC dropdown menu.
13. To cancel or close
Click here to cancel or close the box without saving. Click the green "Set program and LOC" to save changes.
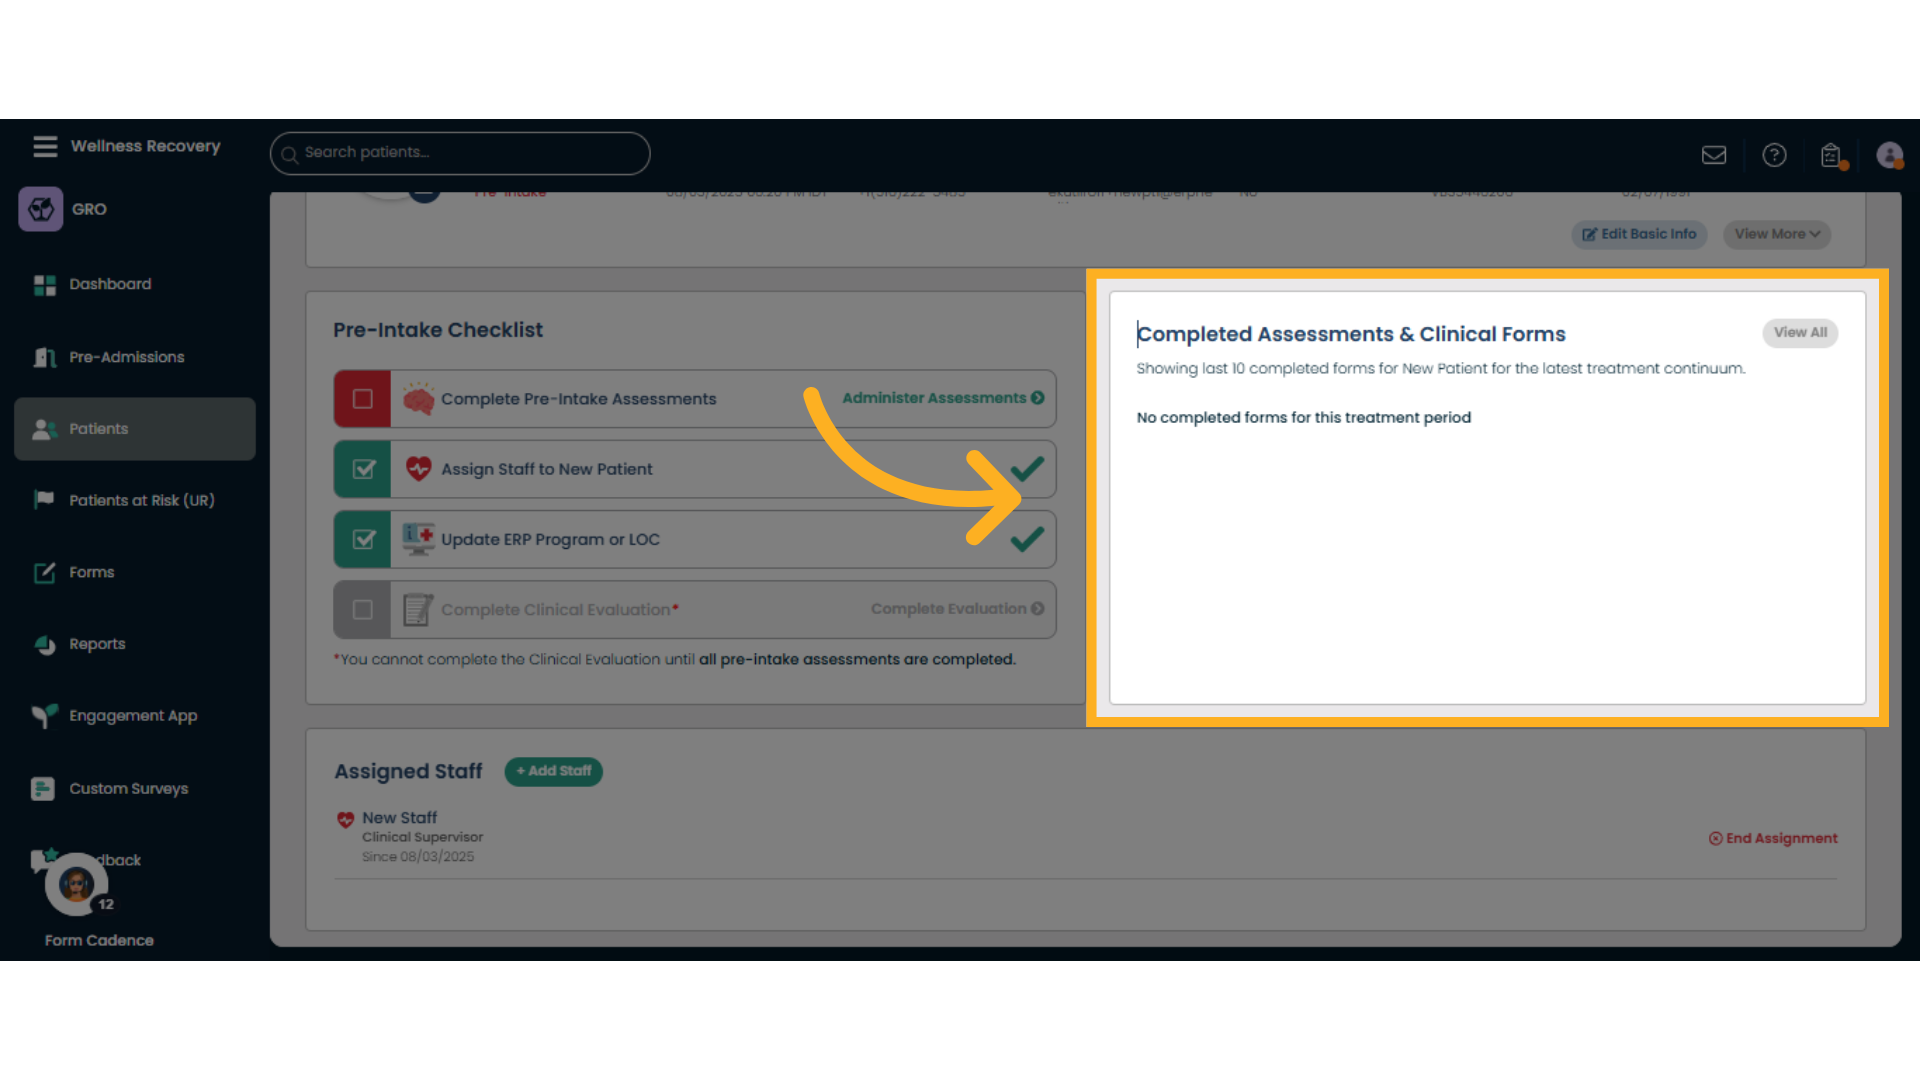
14. Completed Assessments
The 'Completed Assessments & Clinical Forms' section to view recent patient forms. For new patients, this will be blank. Once a patient has filled assessments, this box will be filled with statistics and information.
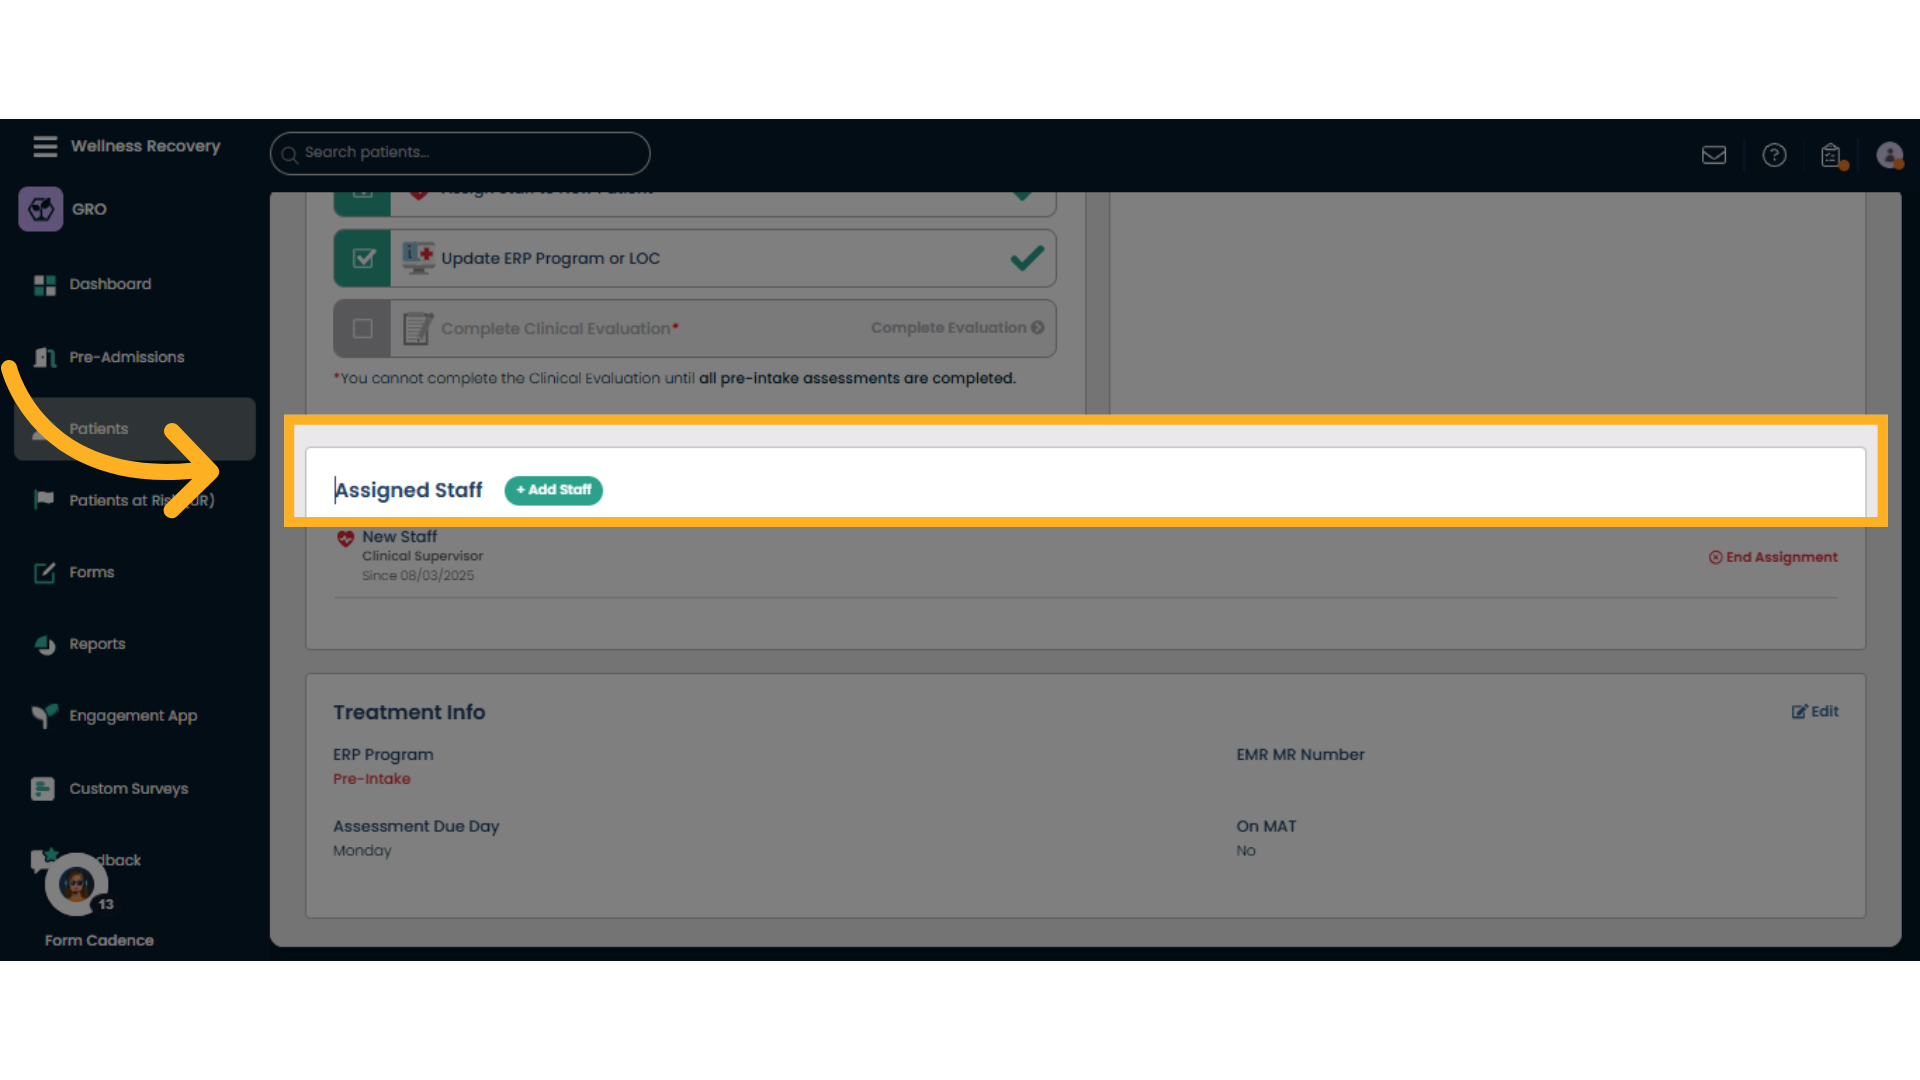
15. Assigned Staff Box
This box lists the currently assigned staff to the patient. You can change the staff here, or add more staff.
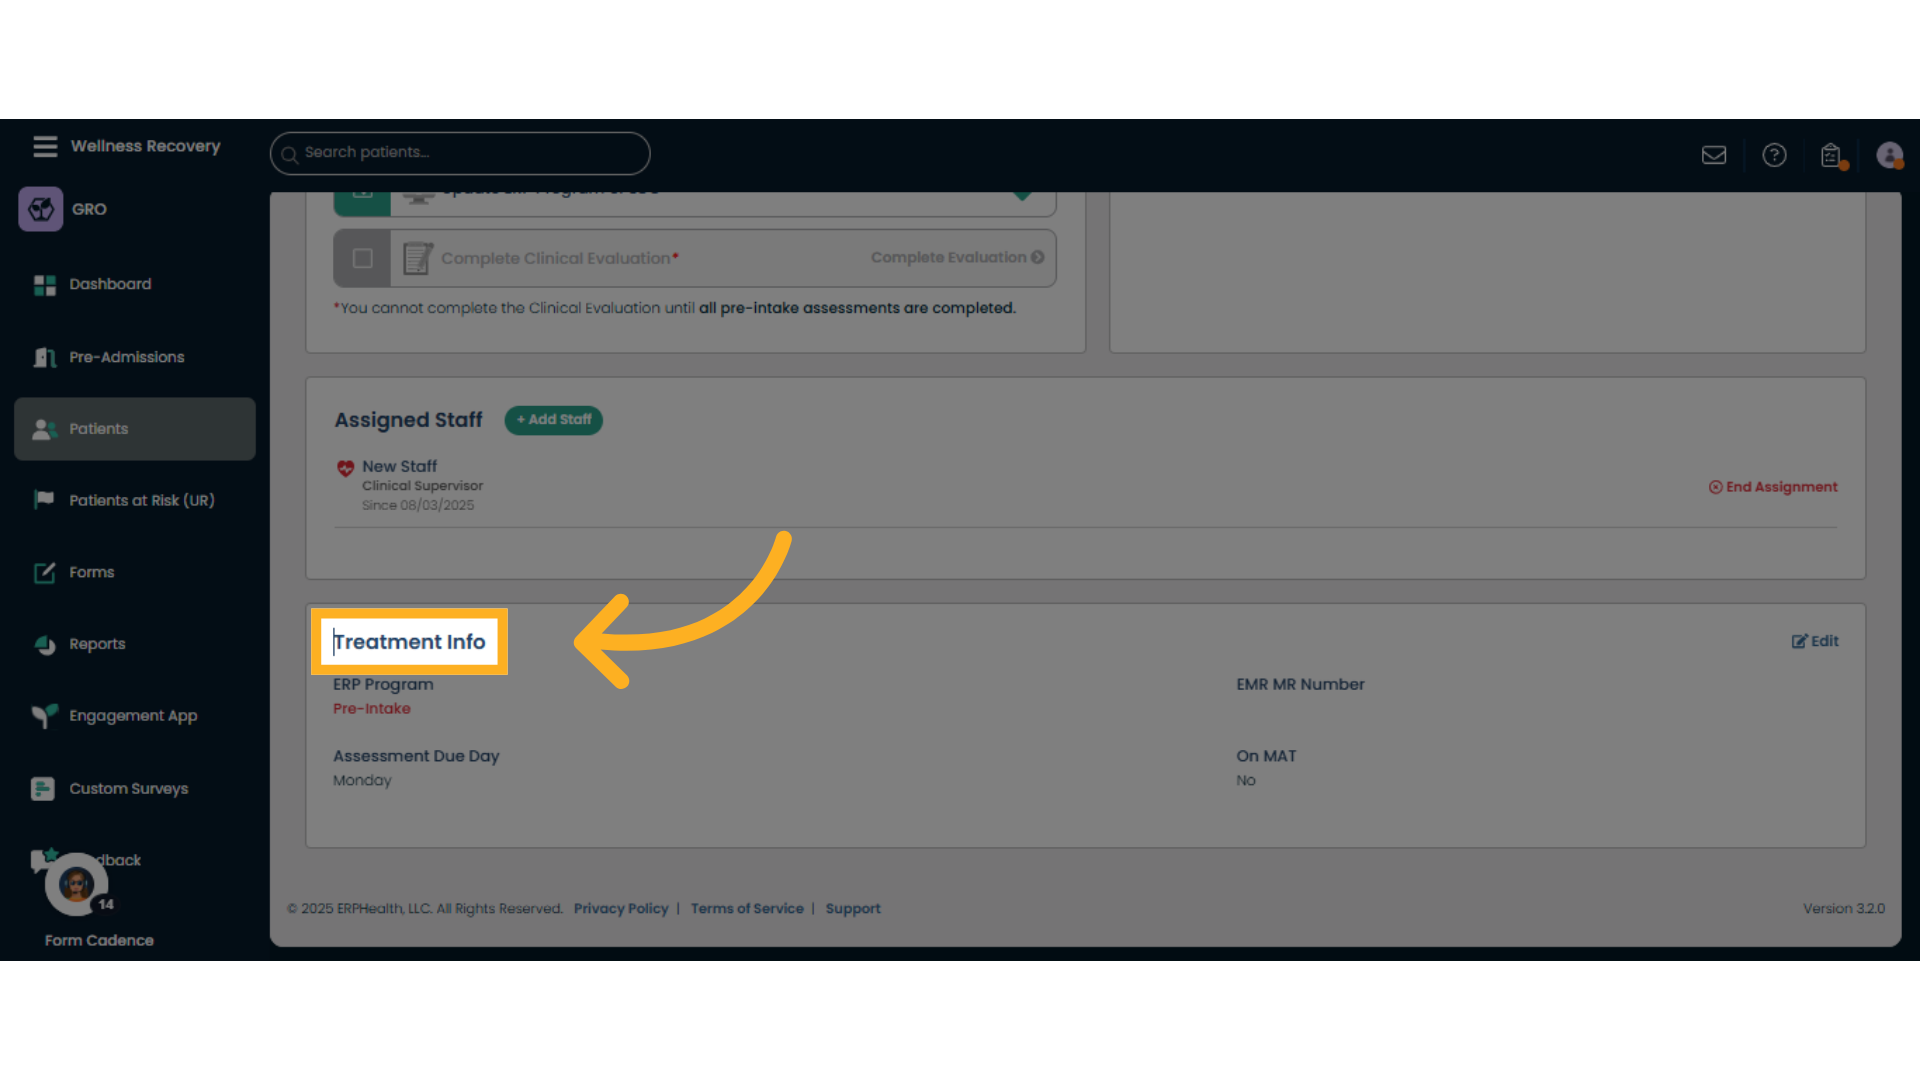
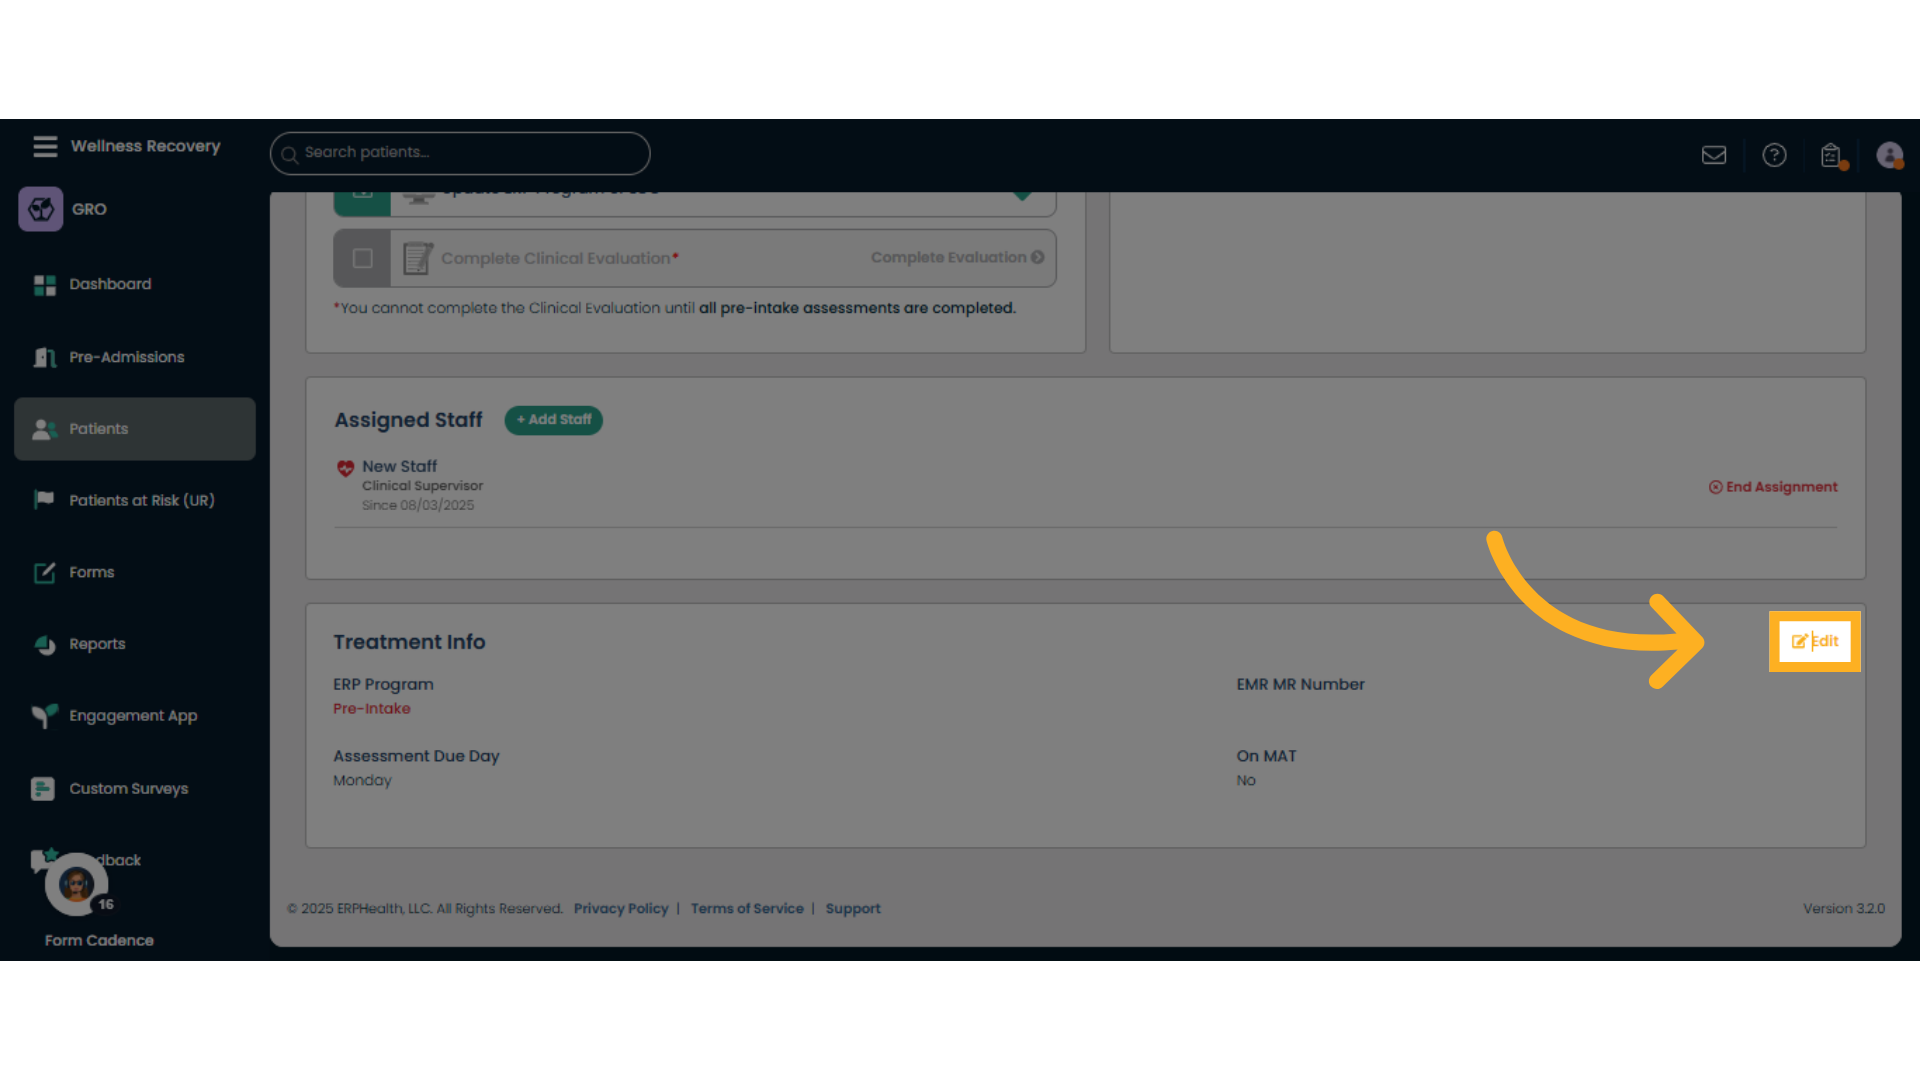
16. "Treatment Info" Box
Access the 'Treatment Info' tab to review patient treatment details.
17. Edit Treatment Info
Enter edit mode by clicking 'Edit' to modify patient treatment information.
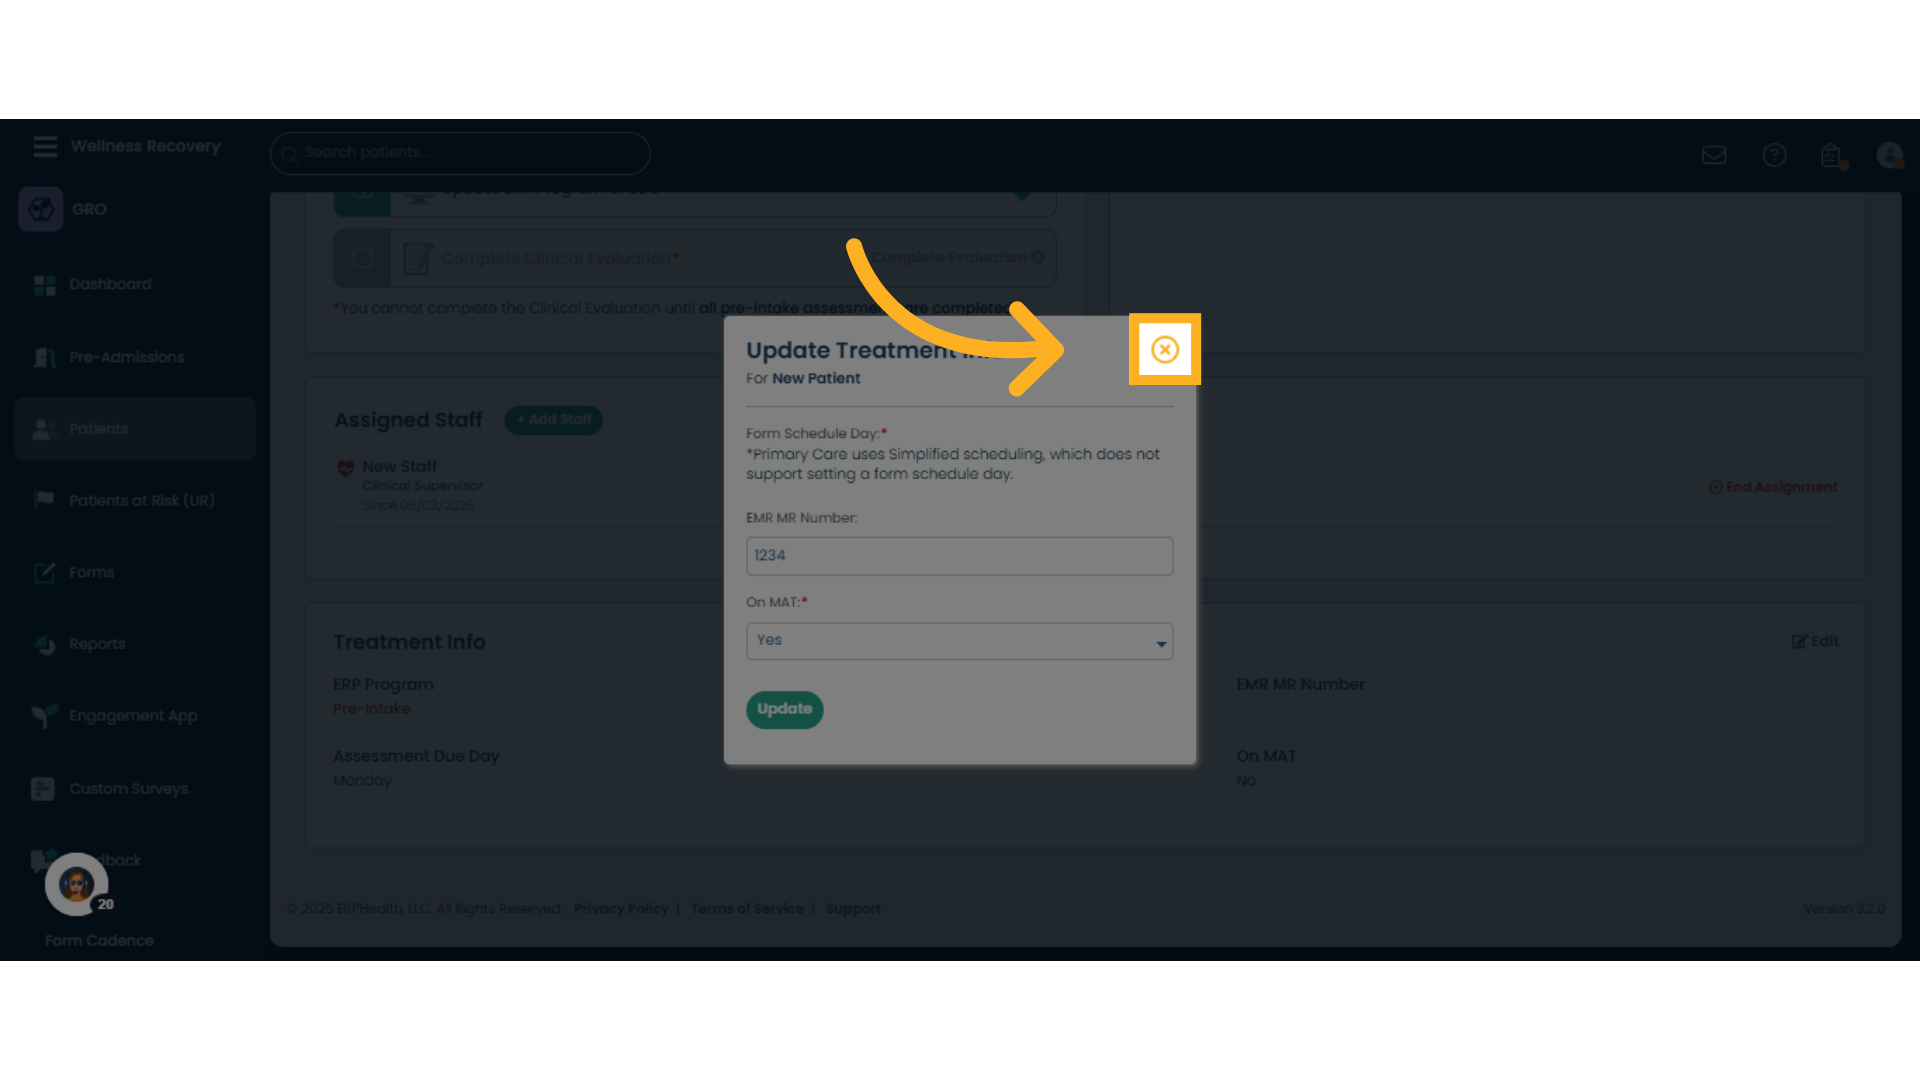
18. Update Treatment Info Box
Here you can enter or edit MR Number, and list if the patient is on MAT
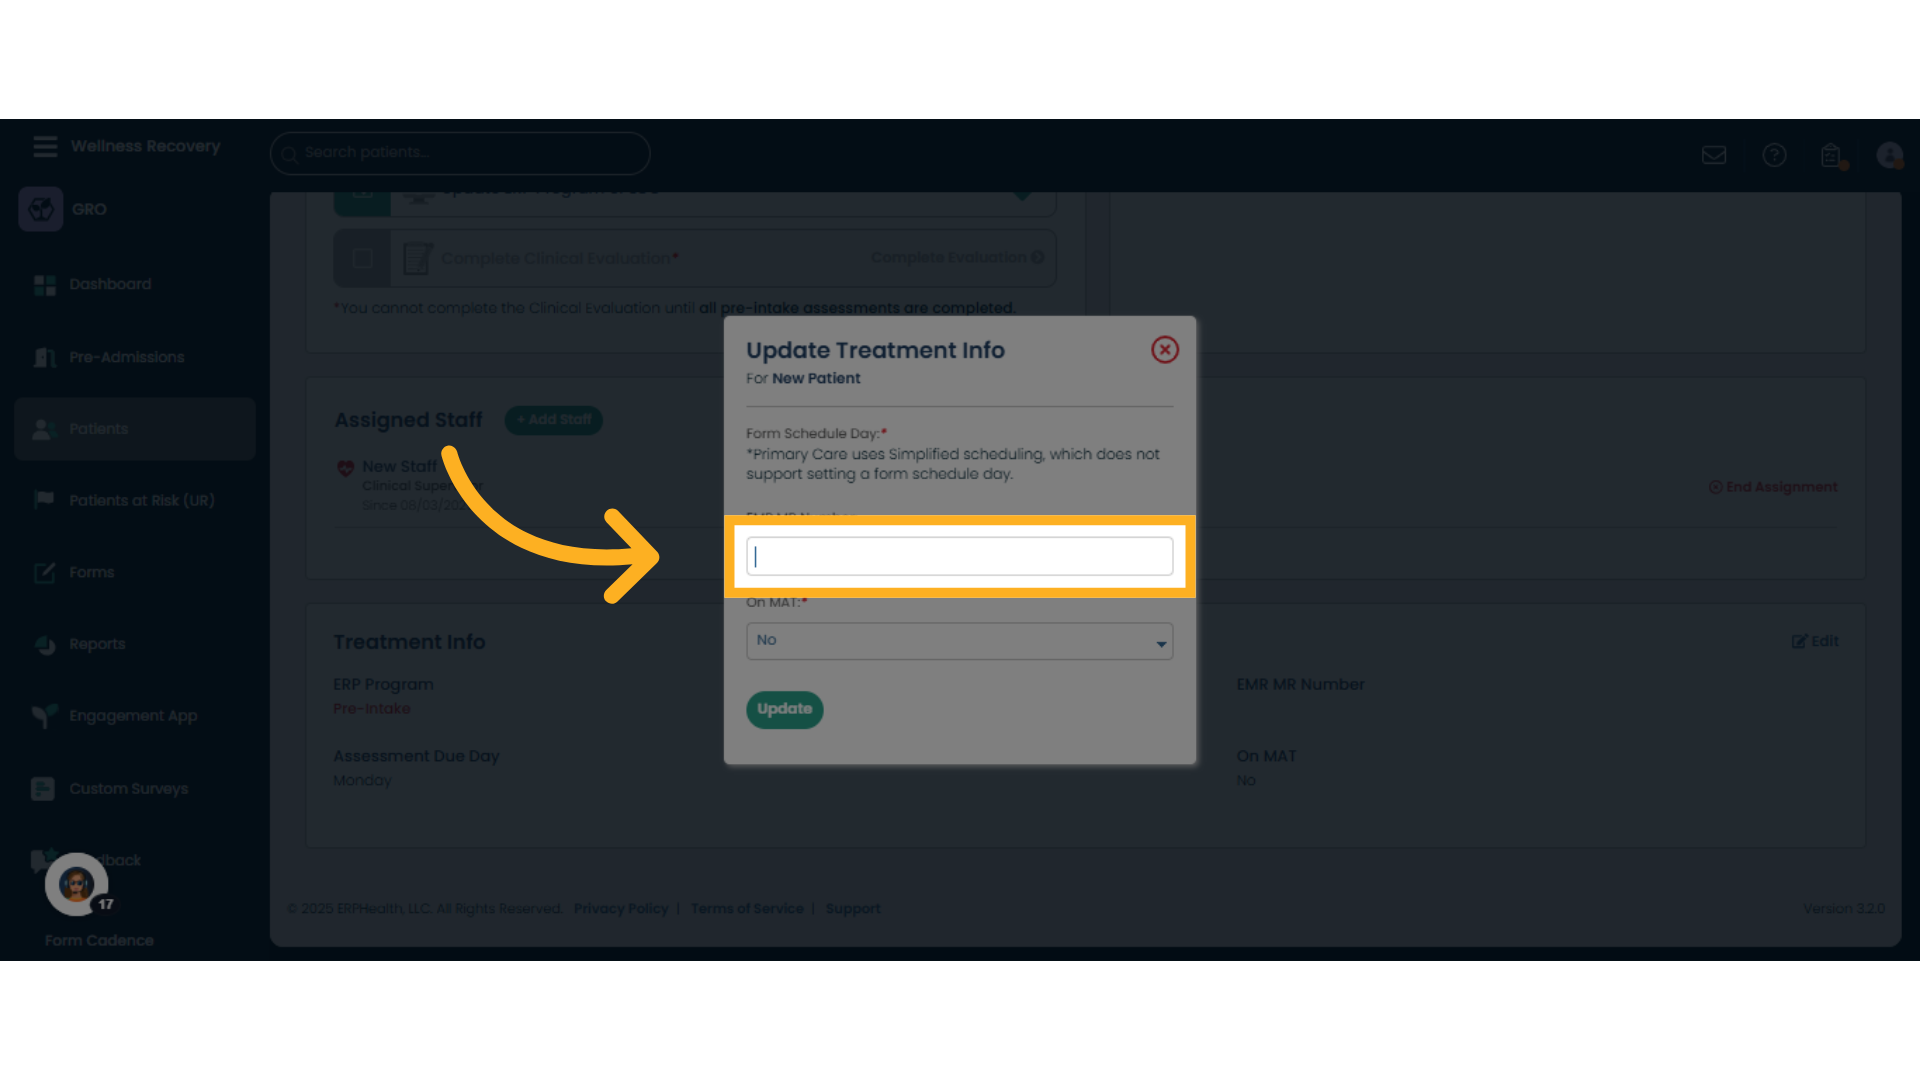
19. MR number
Input the required numeric code or identifier as prompted.
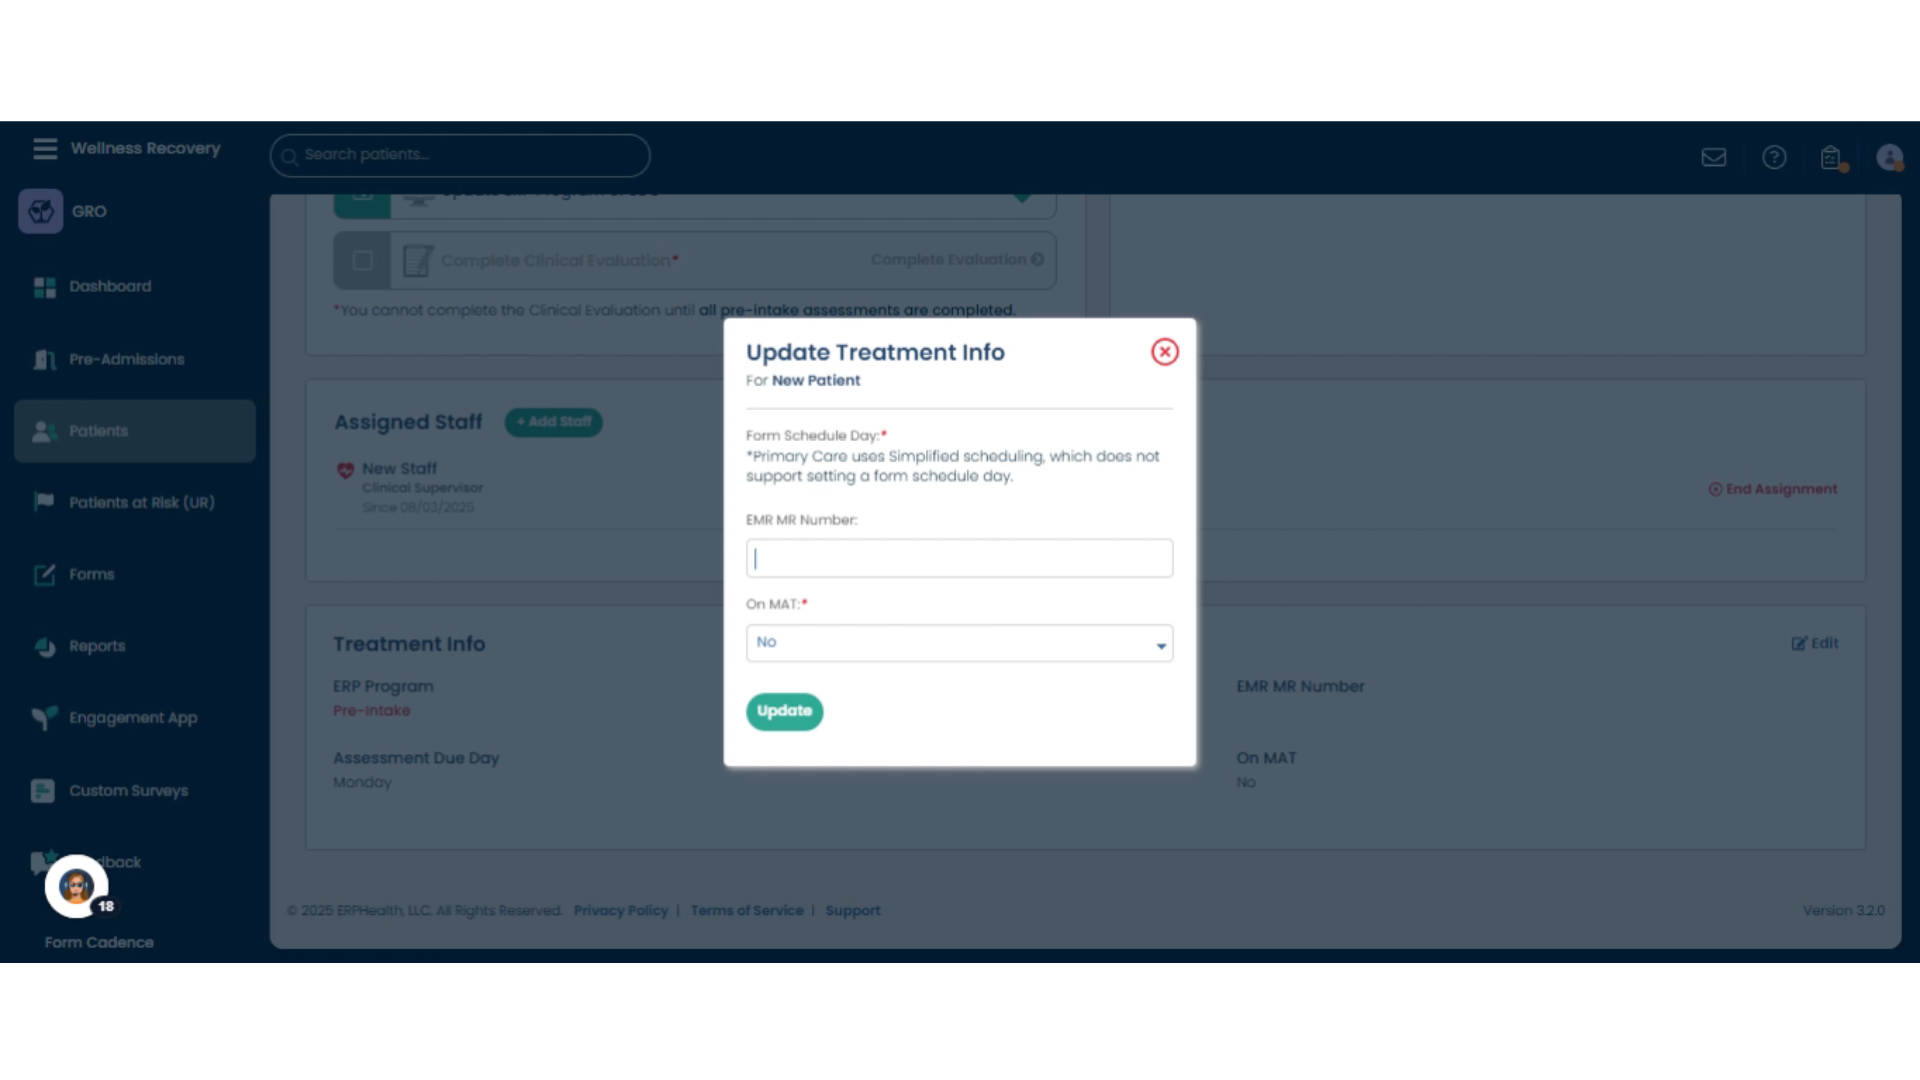
20. Click "Indicate if on MAT"
Indicate the patient's Medication-Assisted Treatment (MAT) status by selecting 'No' or 'Yes'.
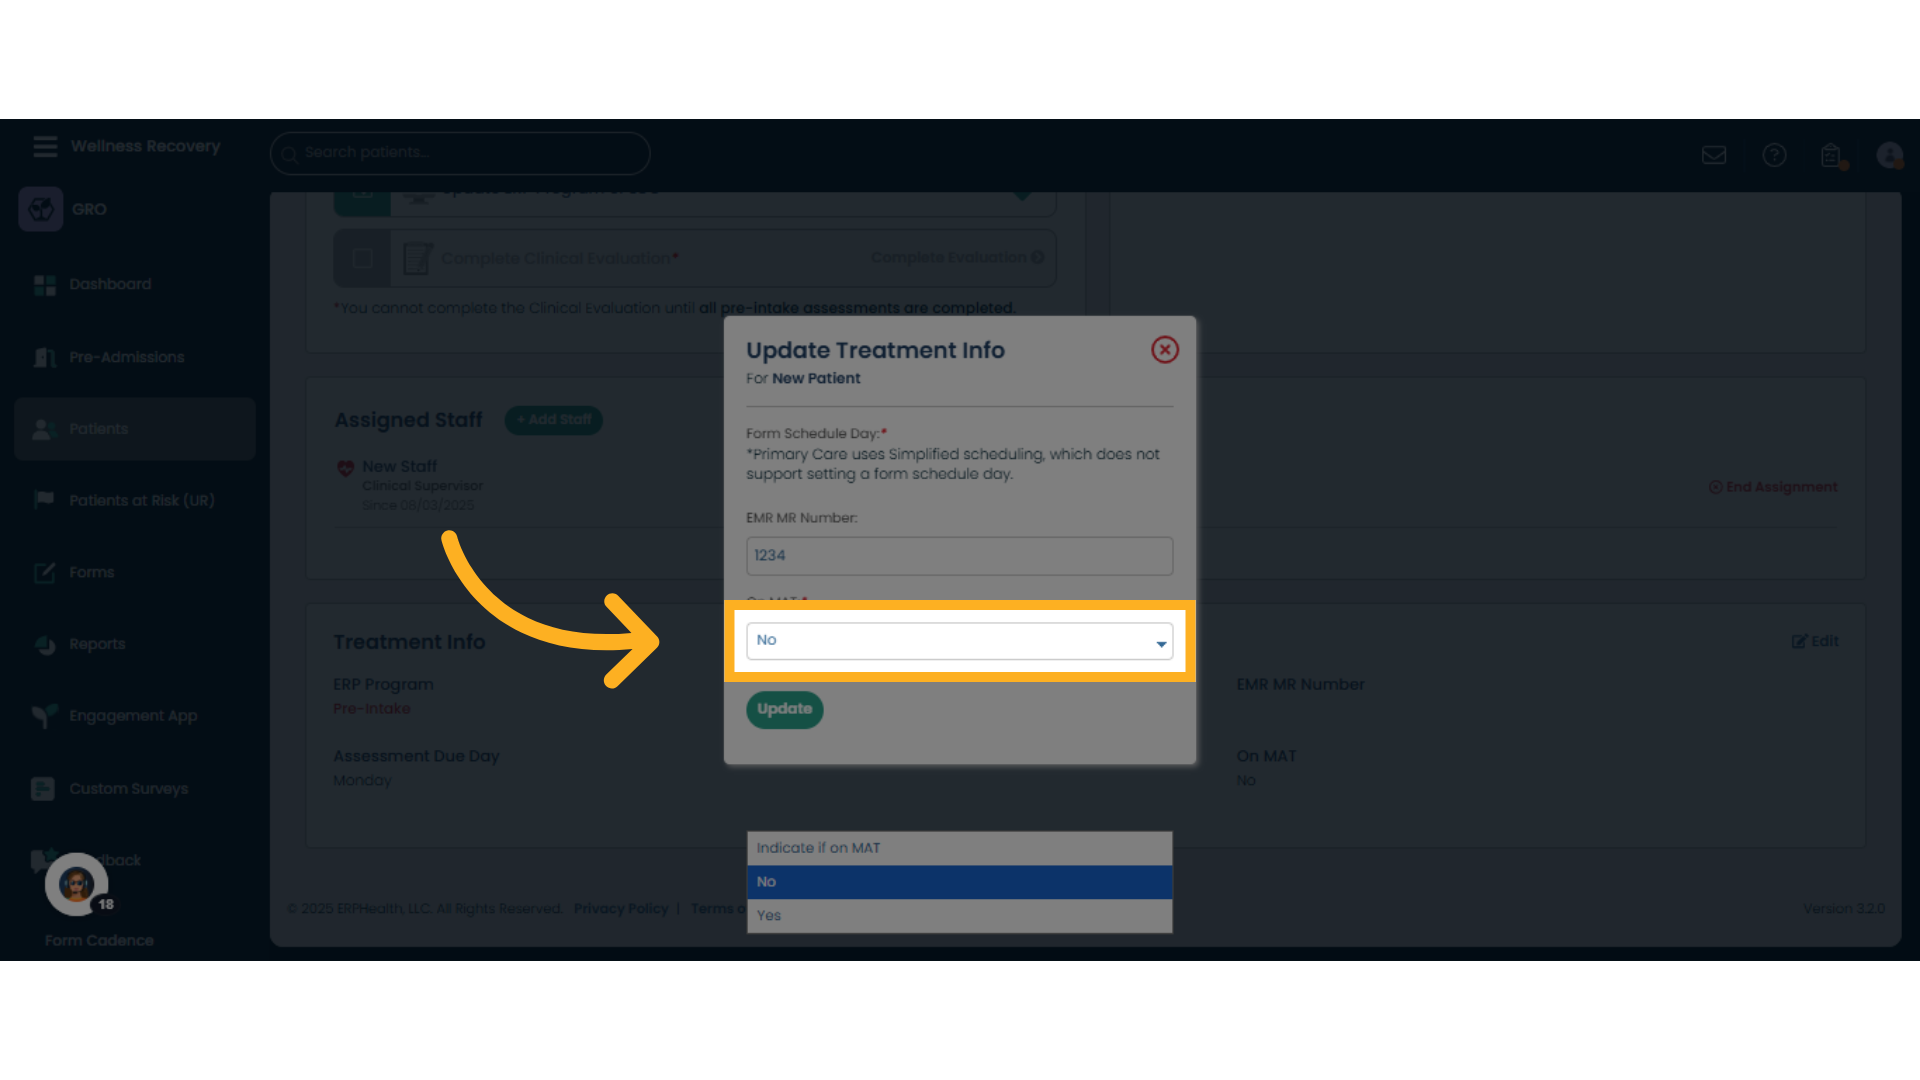
21. Choose correct MAT status
Confirm and fill in the MAT status information as required.

22. Close Treatment info
Click the X in the upper right hand to close and cancel any changes.
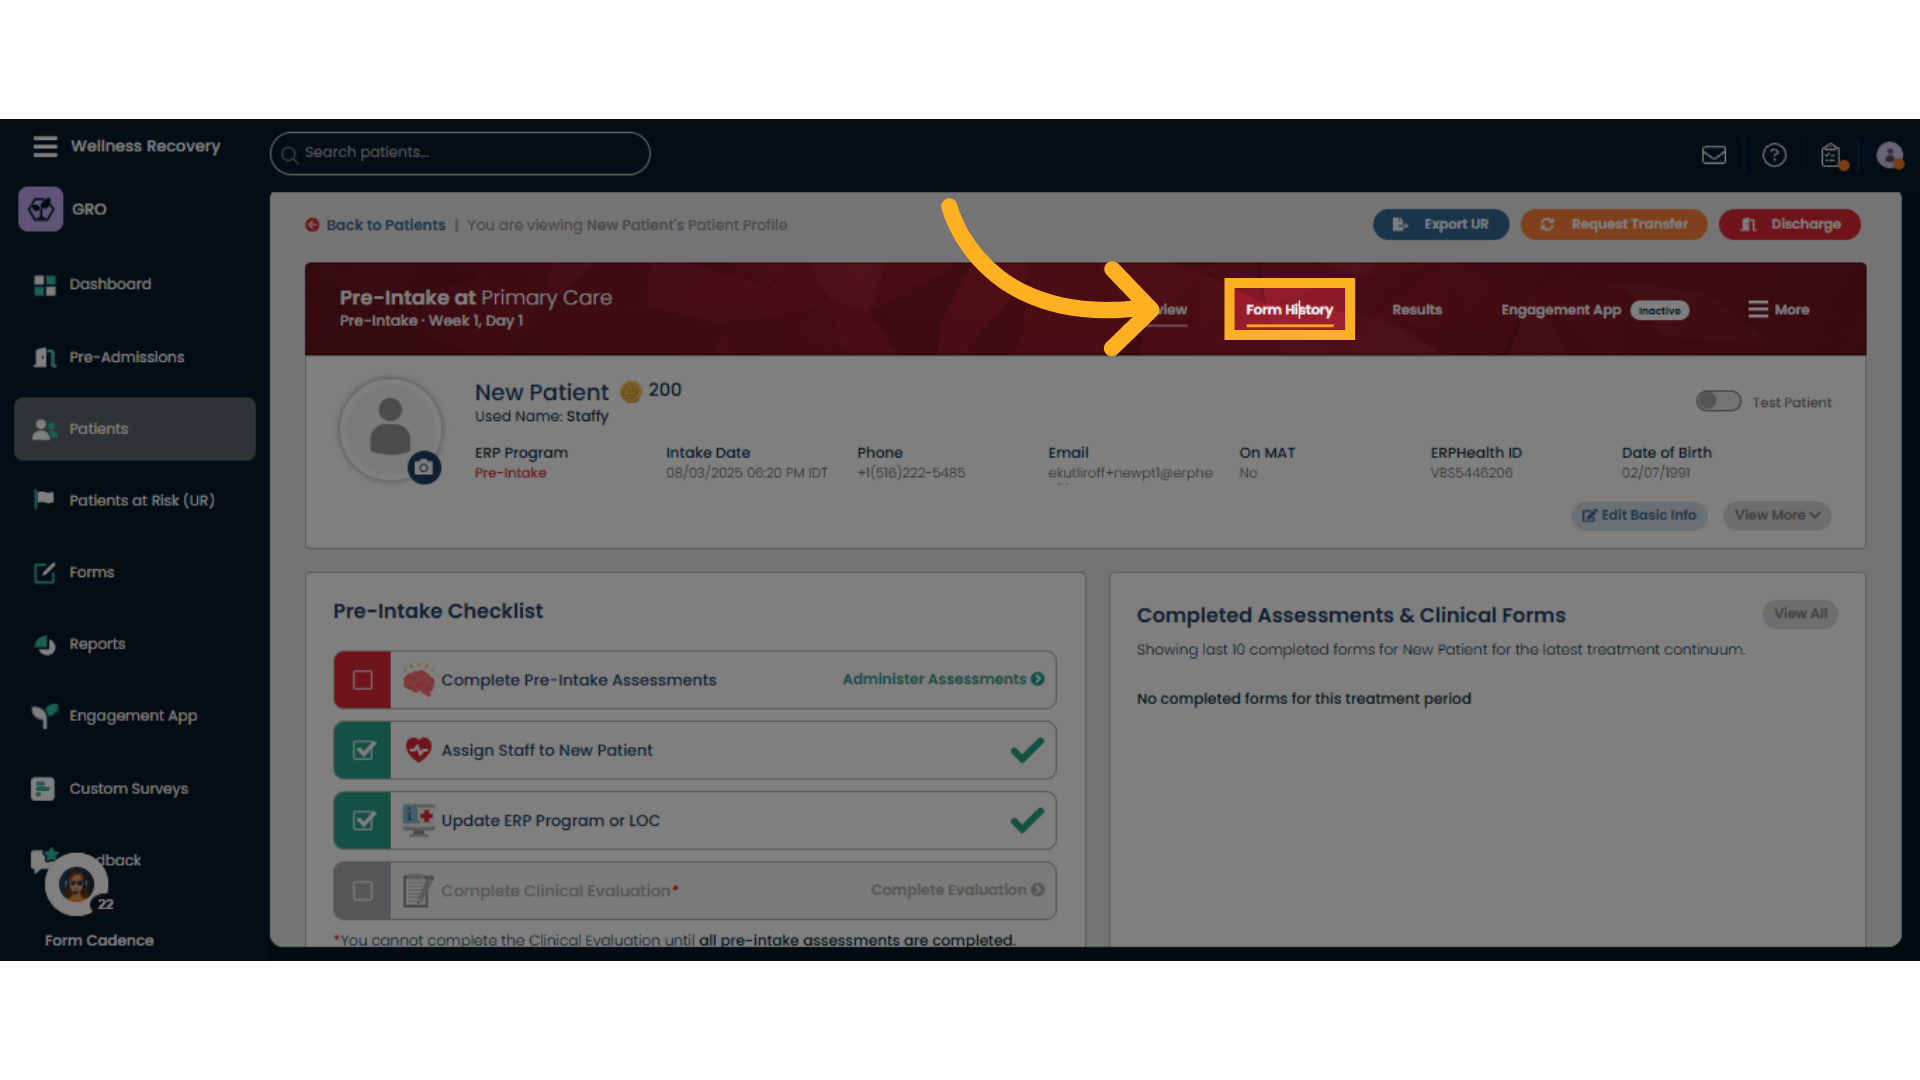
23. Form History
At the top of the Dashboard, there are several tabs for more Patient Information. Click the 'Form History' to review previous patient forms and assessments.
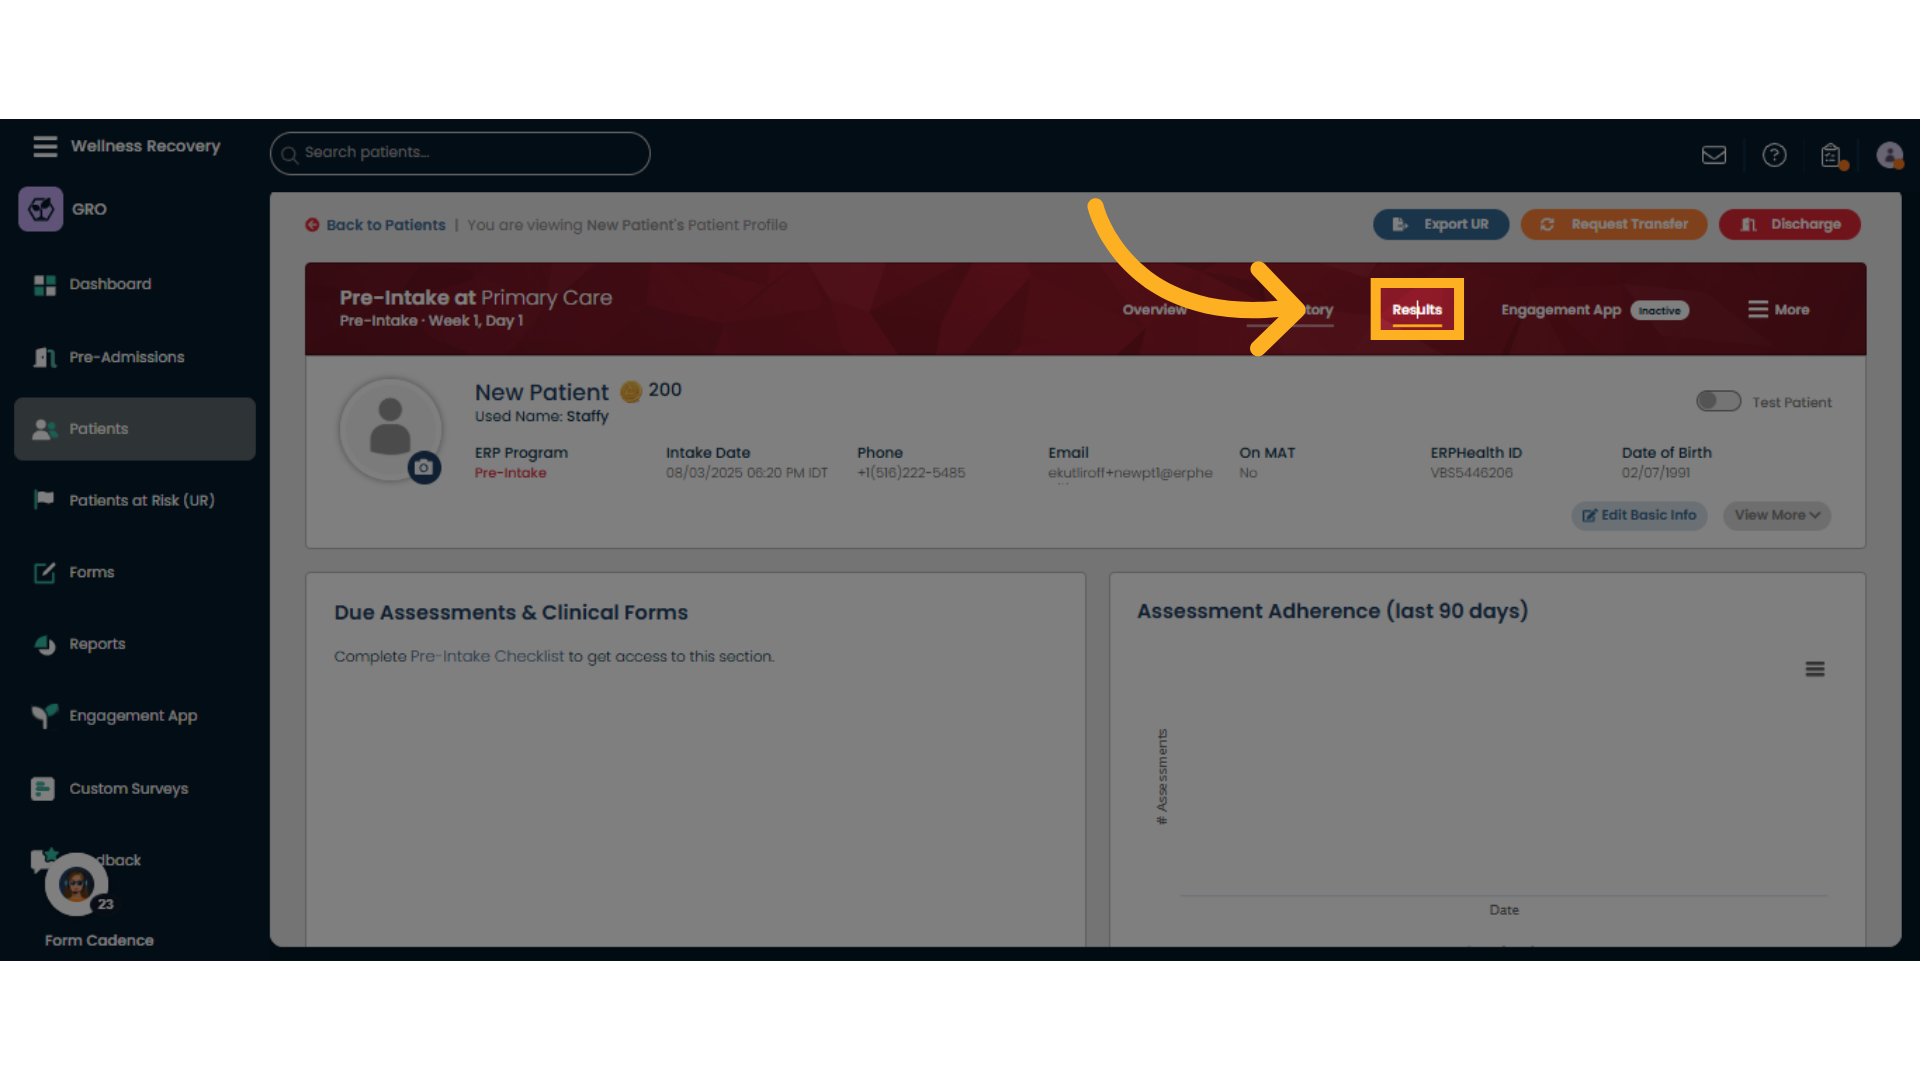
24. Click "Results"
View detailed 'Results' from assessments or clinical forms.
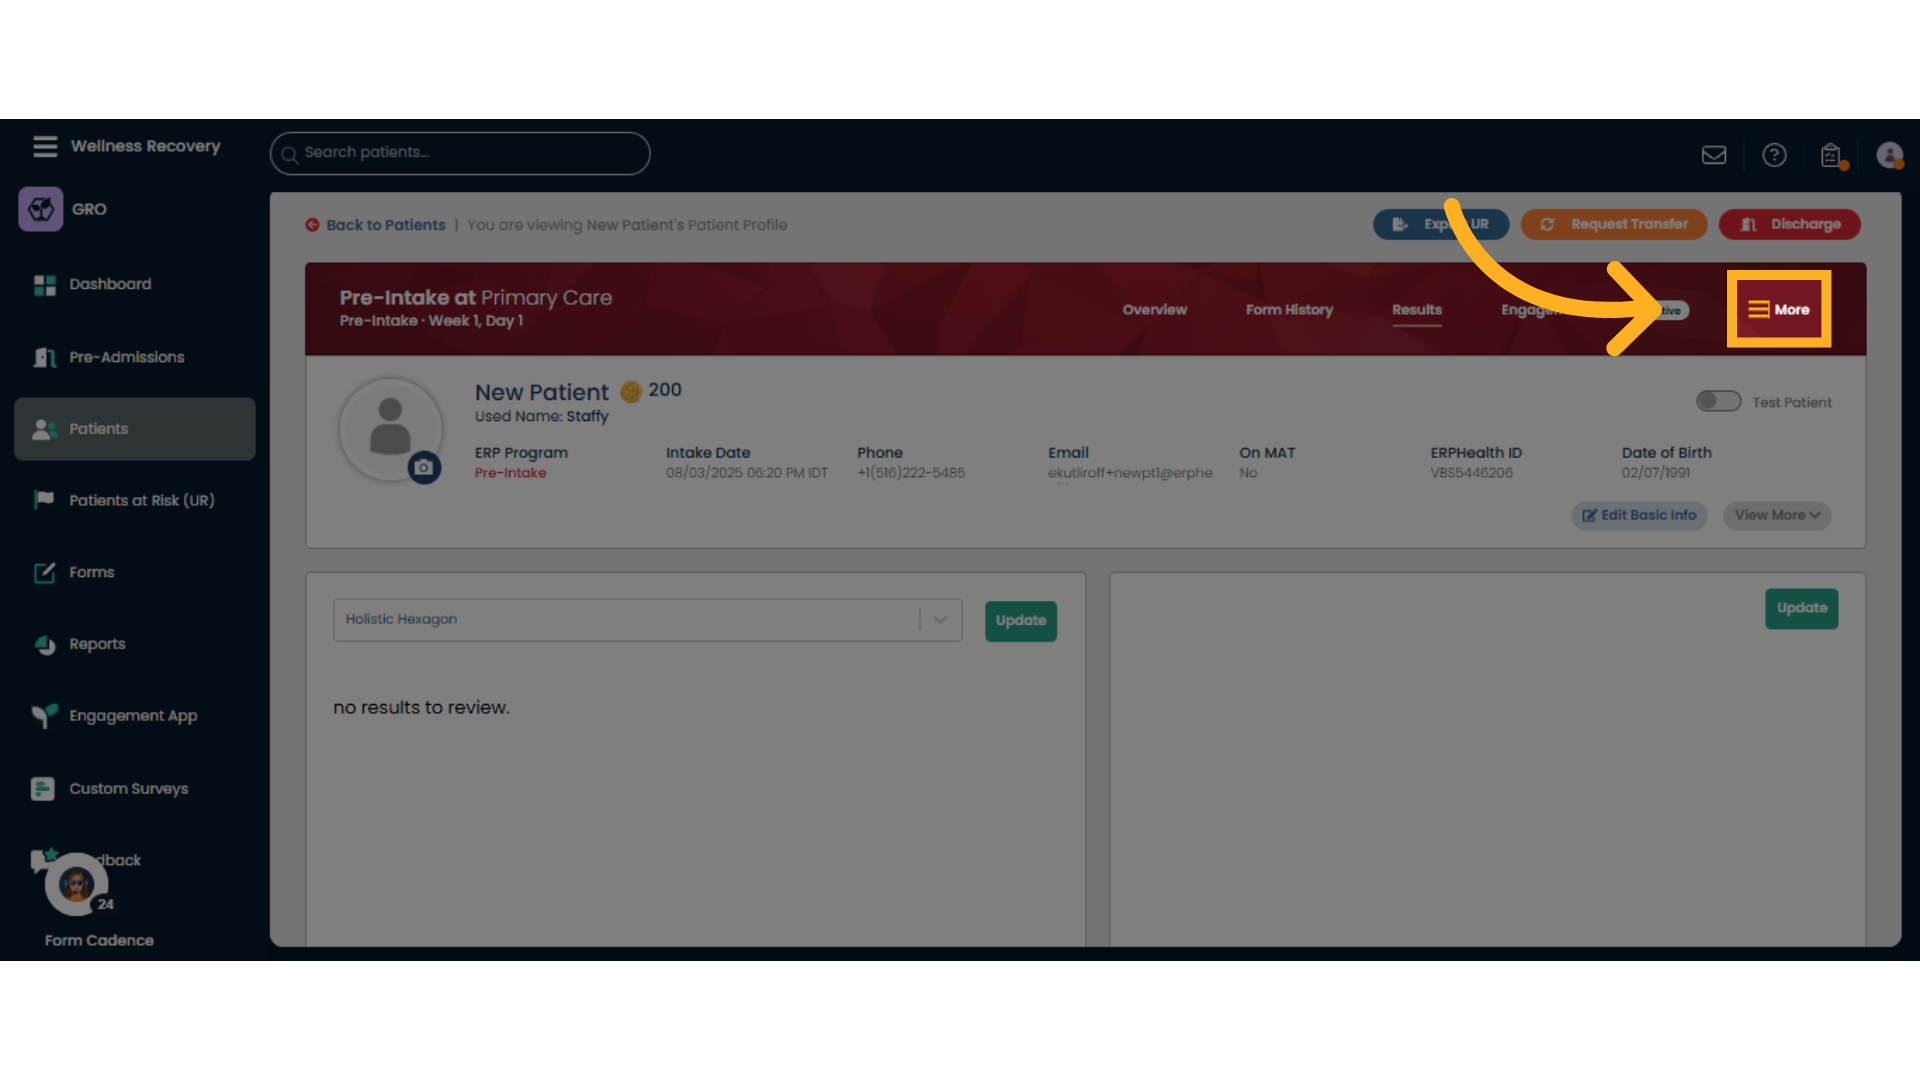
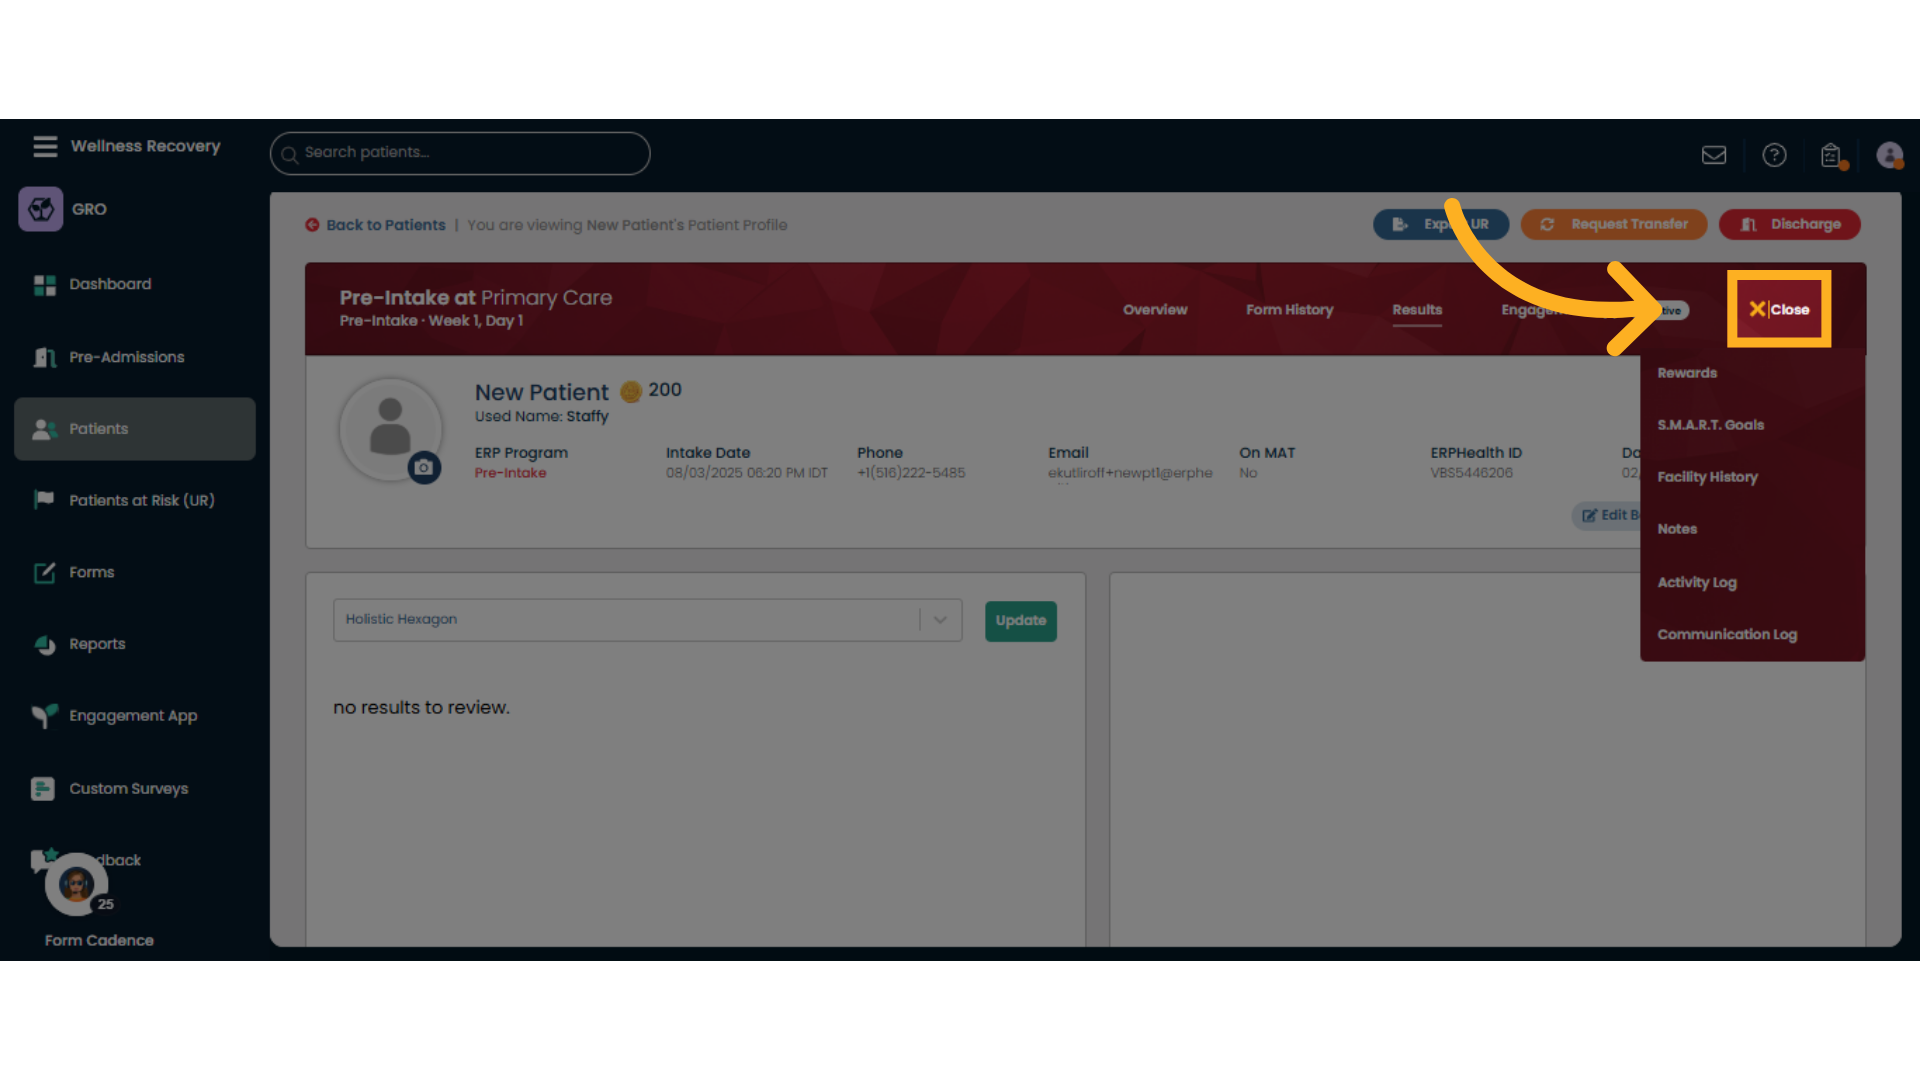
25. Click "More Menu" for more patient options
Access additional options by clicking the 'More Menu'. Here you can view Rewards, add/edit SMART Goals, see facility patient history, Notes, Activity Log and Communication Logs
26. Click "Close" to close current menu dropdown
Close the current window or dialog by selecting 'CloseC' to finish.
This guide covered navigating the New Patient Dashboard, managing patient assessments, assigning staff, updating treatment programs and Levels of Care, reviewing completed forms, and handling patient-specific data efficiently within the ERPHealth system.
Was this article helpful?
That’s Great!
Thank you for your feedback
Sorry! We couldn't be helpful
Thank you for your feedback
Feedback sent
We appreciate your effort and will try to fix the article